

These Monster Cookie Energy Balls bring all the fun flavors of classic monster cookies to your Monday Munchies without any baking required. Packed with wholesome oats, creamy peanut butter, and colorful candy pieces, they’re perfect for lunch boxes, after-school snacks, or whenever you need a quick energy boost that actually tastes like a treat. The best part? They come together in minutes and get better after chilling.
If you love no-bake sweet treats, try our No-Bake Chocolate Eclair Cake for another effortless dessert, or our Banana Pudding Rice Krispie Treats for that same fun, colorful appeal. For more peanut butter goodness, the Nutter Butter Peanut Butter Cheesecake delivers that beloved nutty flavor in creamy form.
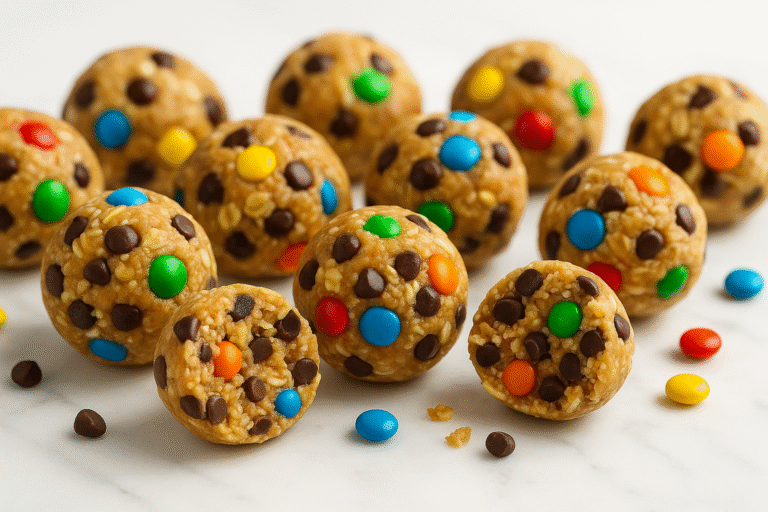
Monster Cookie Energy Balls
Monster Cookie Energy Balls combine wholesome oats and creamy peanut butter with mini chocolate chips and colorful M&M’s for a no-bake treat that’s both satisfying and energizing.
4
servings30
minutes40
minutes300
kcal1
hour10
minutesIngredients
1.5 cups old-fashioned oats
0.5 cup peanut butter
0.25 cup honey
0.25 cup mini chocolate chips
0.25 cup mini M&M’s
1 teaspoon vanilla extract
1 pinch salt
Directions
- In a large mixing bowl, combine the old-fashioned oats, peanut butter, honey, vanilla extract, and salt. Mix thoroughly until well combined.
- Add the mini chocolate chips and mini M&M’s to the mixture, stirring until evenly distributed throughout the mixture.
- Using a cookie scoop or tablespoon, portion out the mixture into 1-inch balls. Roll each portion between your palms to shape into a ball.
- Place the formed energy balls on a baking sheet lined with parchment paper. Chill in the refrigerator for at least 30 minutes to set.
- Transfer the chilled energy balls to an airtight container for storage; keep refrigerated for up to one week.
Nutrition Facts
- Total number of serves: 4
- Calories: 150kcal
- Cholesterol: 0mg
- Sodium: 620mg
- Potassium: 400mg
- Sugar: 8g
- Protein: 6g
- Calcium: 60mg
- Iron: 2mg
Can’t get enough of great flavors? Check out these popular recipes that readers love making again and again.
For sweet no-bake favorites, our Cheesecake Brownies and Butter Pecan Cake deliver rich indulgence without complicated techniques. When you’re planning kid-friendly treats, the Blueberry Buttermilk Pancake Casserole and Hawaiian Banana Bread with Coconut & Pineapple bring fun flavors families love. Need quick breakfast solutions? Our English Muffin Breakfast Pizza and Southern Breakfast Enchiladas with Sausage Gravy turn morning meals into something special.
Browse our full collection for more kitchen inspiration that’ll have your family asking for seconds.


