

This Brownie Refrigerator Cake brings decadent simplicity to your Sweet Sundae with layers of rich, fudgy brownies topped with cloud-like whipped cream and delicate chocolate shavings. It’s the perfect make-ahead dessert that gets better as it chills—ideal for dinner parties, potlucks, or when you want something impressive without the last-minute fuss. Just assemble, refrigerate, and enjoy perfectly set slices.
If you love rich chocolate desserts, you’ll adore our Cheesecake Brownies with their creamy swirled perfection and similar brownie base. For another make-ahead favorite, try the No-Bake Chocolate Eclair Cake—it delivers that same effortless elegance with layers of cream and chocolate that develop incredible flavor overnight.
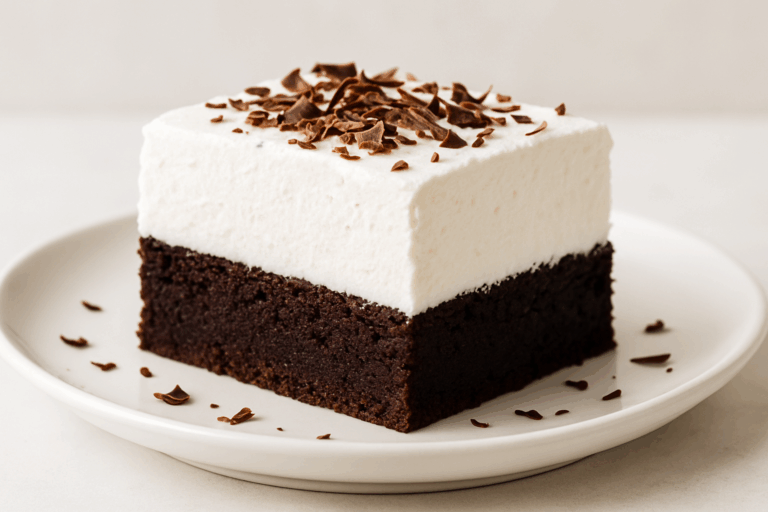
Brownie Refrigerator Cake
Brownie Refrigerator Cake layers fudgy homemade brownies with silky whipped cream and chocolate shavings for an irresistible make-ahead treat.
4
servings30
minutes40
minutes300
kcal1
hour10
minutesIngredients
1 pack brownie mix
0.5 cup water
0.3 cup vegetable oil
1 egg
1 cup heavy whipping cream
0.25 cup powdered sugar
1 tsp vanilla extract
0.5 cup chocolate shavings
Directions
- Preheat the oven to 350°F and grease a baking pan as per the brownie mix instructions.
- Mix the brownie mix, water, vegetable oil, and egg in a bowl until smooth and evenly combined.
- Pour the brownie batter into the prepared pan and bake in the preheated oven for 25-30 minutes.
- Let the brownies cool completely before proceeding with the next steps. Meanwhile, prepare the whipped cream.
- In a bowl, beat together the heavy whipping cream, powdered sugar, and vanilla extract until soft peaks form.
- Carefully spread the whipped cream over the cooled brownie layer evenly using a spatula.
- Sprinkle the chocolate shavings over the whipped cream layer as desired for garnish.
- Refrigerate the assembled cake for at least 2 hours before serving to allow it to set properly.
Nutrition Facts
- Total number of serves: 4
- Calories: 250kcal
- Cholesterol: 0mg
- Sodium: 620mg
- Potassium: 400mg
- Sugar: 8g
- Protein: 6g
- Calcium: 60mg
- Iron: 2mg
Can’t get enough of great flavors? Check out these popular recipes that readers love making again and again.
For chocolate lovers, our Chocolate Cherry Upside Down Cake and S’mores Brownies deliver that rich, indulgent satisfaction you crave. When you need impressive make-ahead desserts, the Butter Pecan Cake and White Chocolate Raspberry Poke Cake bring bakery-quality results to your table. Want something fruity and fresh? Our Strawberry Peach Crisp and Key Lime Pie Bars offer the perfect balance of sweet and tangy.
Browse our full collection for more kitchen inspiration that’ll have your family asking for seconds.


