
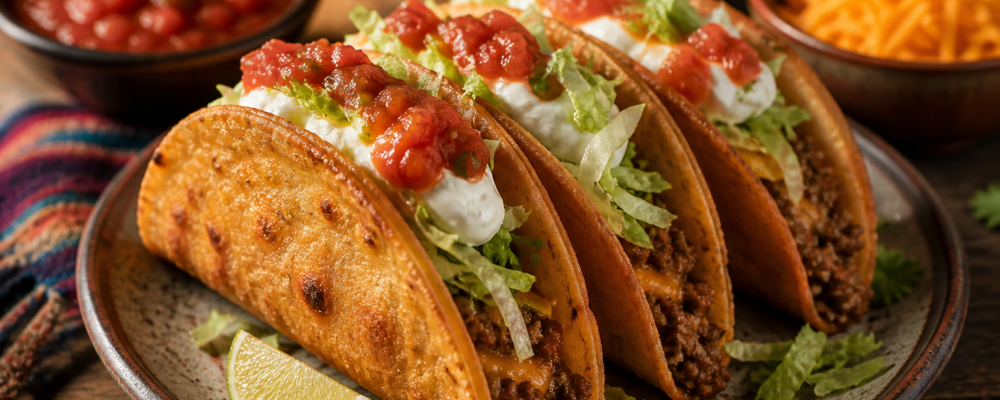

Let me tell you about the first time I successfully made Tacos Dorados at home. I’d been intimidated by the frying process—worried about oil temperature, splattering, the tortillas falling apart—all the things that can go wrong. But once I actually tried it, I realized it’s much simpler than I’d imagined. And that first bite, when the crispy shell shattered and gave way to warm, cheesy beef filling? Absolute magic. I understood immediately why these are beloved comfort food across Mexico and why grandmothers have been making them for generations.
The beauty of Tacos Dorados lies in their simplicity and that incredible textural contrast. You start with basic ingredients—ground beef seasoned with cumin and chili powder, some cheese, corn tortillas. Nothing fancy. But when you fold those filled tortillas and fry them in hot oil, something transformative happens. The tortilla goes from soft and pliable to golden and crispy, developing this incredible crunch that you just can’t achieve any other way. The cheese melts and binds everything together, and the beef stays moist and flavorful inside its crispy shell.
What makes these tacos special is how they balance indulgence with freshness. Yes, they’re fried and rich, but then you top them with cold, crisp lettuce, cool sour cream, and bright salsa. Those fresh elements cut through the richness and prevent the tacos from feeling heavy. It’s the same principle that makes nachos or quesadillas so good—you need that contrast between warm and cool, rich and fresh, creamy and acidic.
These are the tacos I make when I want Taco Tuesday to feel like a treat, when I’m craving something deeply satisfying and nostalgic, or when I want to show someone what real Mexican comfort food tastes like. They remind me that sometimes the best recipes are the traditional ones, the ones that have been perfected over generations because they simply work.
─────────
The Inspiration Behind This Recipe
Tacos Dorados are a traditional Mexican preparation that exists under various names across different regions—sometimes called flautas when rolled tightly, or taquitos when smaller. The technique of filling and frying tortillas dates back generations as a way to transform leftover meat or potatoes into a new, exciting meal. The frying process serves multiple purposes: it preserves the filling by creating a sealed pocket, adds textural interest to simple ingredients, and creates something special from everyday components. This recipe represents the home-style version, simpler and more rustic than restaurant preparations but no less delicious. It’s the kind of food Mexican mothers and grandmothers have been making for family dinners for decades—practical, economical, and deeply satisfying comfort food that brings people together around the table.
─────────
A Brief History of Fried Tacos in Mexican Cuisine
While soft tacos are considered more traditional in Mexico, fried tacos have a long history, particularly in home cooking where resourceful cooks sought ways to transform leftovers into new meals. The practice of filling tortillas and frying them likely emerged from practical necessity—frying extends the life of day-old tortillas and creates a sealed pocket that preserves fillings. Different regions developed their own versions: flautas (flutes) from central Mexico are rolled tightly and fried; tacos dorados from northern regions are often folded; and taquitos are smaller versions popular as snacks or appetizers. The technique became particularly popular in Mexican-American communities where fried tacos represented comfort food that connected families to their heritage. Today, Tacos Dorados remain beloved home-cooking staples, representing the kind of unpretentious, delicious food that defines Mexican family meals.
─────────
Why This Cooking Method Works
Warming tortillas makes them pliable — Cold tortillas crack when folded. Warming in the microwave or on a skillet makes them flexible enough to fold without breaking.
Toothpicks secure during frying — The toothpicks prevent the tacos from opening in the hot oil, which would spill filling and create a mess. Remove them before serving.
Shallow frying works best — You don’t need deep-frying equipment. An inch of oil in a skillet provides enough to crisp the tacos while flipping them halfway through.
Medium-high heat creates golden crust — Too low and the tacos absorb excess oil and become greasy; too high and they burn before crisping. Around 350°F is ideal.
Draining on paper towels is essential — This removes excess surface oil, preventing the tacos from being greasy and allowing the crispness to be appreciated.
Cool toppings provide contrast — The cold lettuce, sour cream, and salsa aren’t just garnish—they’re essential for balancing the rich, hot fried tacos.
Cheese acts as internal glue — The melted cheese helps bind the beef filling together and creates creamy richness that balances the crispy shell.
─────────
Flavor Profile: What to Expect
Crispy, savory, and deeply satisfying — these tacos deliver shatteringly crisp corn tortilla shells with golden, toasted flavor, giving way to warm, savory ground beef seasoned with earthy cumin and mild chili powder heat. Melted cheese provides creamy, salty richness that binds the filling together. Cool, crisp lettuce adds refreshing crunch, tangy sour cream provides cooling creaminess, and bright salsa brings acidic punch and fresh tomato flavor. The textural contrast is extraordinary—crispy shell, tender filling, crunchy lettuce—while temperature contrast (hot tacos, cold toppings) makes every bite dynamic. It’s indulgent comfort food that doesn’t feel heavy thanks to the fresh toppings that balance the richness.
─────────
Tips for Making the Best Tacos Dorados
Use fresh corn tortillas — Stale or dry tortillas crack easily. Fresh, pliable tortillas are essential for successful folding.
Don’t overfill — One to two tablespoons of filling is plenty. Overstuffed tacos are impossible to seal and fry properly.
Secure toothpicks firmly — Push them through both layers of tortilla near the opening to prevent the taco from unfolding in the oil.
Test oil temperature — Drop a small piece of tortilla in the oil. If it sizzles immediately and floats, the oil is ready. Use a thermometer for precision (350°F).
Don’t overcrowd the pan — Fry 2-3 tacos at a time. Overcrowding lowers oil temperature and creates soggy rather than crispy tacos.
Flip halfway through — Each side needs about 2-3 minutes. Watch for golden-brown color and listen for active sizzling.
Drain on paper towels immediately — Set up a paper towel-lined plate before you start frying for quick, efficient draining.
Remove toothpicks carefully — They’ll be hot. Use tongs and pull straight out to avoid tearing the taco.
Serve immediately — These are best right out of the oil when they’re at peak crispiness. They soften as they sit.
Season the beef well — The filling needs to be flavorful on its own since the fried shell doesn’t add much seasoning.
─────────
Serving Suggestions and Side Pairings
These crispy Tacos Dorados pair beautifully with:
- Mexican Street Corn Salad (Esquites) for creamy, sweet contrast
- Cilantro Lime Rice to balance the richness
- Refried beans or black beans for traditional accompaniment
- Guacamole for extra creaminess
- Pico de gallo for fresh, chunky topping option
- Pickled jalapeños for heat lovers
- Lime wedges for squeezing over tacos
- Mexican crema or extra sour cream
- Radish slices for peppery crunch
- Simple cabbage slaw with lime vinaigrette
Topping variations:
- Traditional — Lettuce, sour cream, salsa, and cheese only
- Loaded — Add guacamole, pico de gallo, pickled jalapeños, and cotija cheese
- Simple — Just salsa and lime for minimal, clean flavors
- Creamy — Extra sour cream or Mexican crema with cilantro
─────────
Storage, Reheating, and Make-Ahead Tips
Storage:
- Store fried tacos in an airtight container in the refrigerator for up to 2 days
- They will lose crispness when stored; reheating helps restore some texture
- Store toppings separately
Reheating:
- Best method: Reheat in a 375°F oven for 5-7 minutes to restore crispness
- Alternative: Reheat in air fryer at 350°F for 3-4 minutes
- Microwave works but won’t restore crispness—tacos will be soft
- Add fresh toppings after reheating
Make-Ahead Tips:
- Cook and season beef filling up to 3 days ahead; reheat before assembling
- Assemble unfried tacos up to 4 hours ahead; refrigerate on a plate
- Fry just before serving for best texture
- Prep all toppings the day before and store separately
Freezing:
- Freeze assembled, unfried tacos on a baking sheet until solid
- Transfer to freezer bags for up to 2 months
- Fry directly from frozen, adding 1-2 minutes to cooking time
- Can also freeze fried tacos, but texture is best when fried fresh
- Do not freeze toppings
Leftover filling uses:
- Make quesadillas, nachos, or burrito bowls
- Use in taco salads or stuffed peppers
- Top baked potatoes or rice bowls
- Mix into scrambled eggs for breakfast tacos
─────────
Why This Recipe Deserves a Spot in Your Taco Tuesday Rotation
Because sometimes Taco Tuesday deserves to be indulgent and nostalgic. These Tacos Dorados represent comfort food in its purest form—simple ingredients transformed through a time-honored technique into something that feels special and celebratory. Yes, they require a bit more effort than assembling soft tacos, and yes, there’s frying involved. But the payoff is extraordinary: crispy, golden tacos with melted cheese inside that taste like the best version of childhood memories. They’re also wonderfully versatile—use different fillings (shredded chicken, potatoes, beans), adjust the toppings to your preference, and scale the recipe up or down easily. Most importantly, they’re the kind of food that makes people genuinely happy. When you serve Tacos Dorados, you’re not just feeding people—you’re creating an experience, honoring tradition, and reminding everyone why simple, well-executed food is often the most satisfying. For those times when Taco Tuesday calls for something truly special, these golden, crispy tacos deliver every single time.
─────────
Recommended Drink Pairing
Mexican lager (Corona, Modelo, Pacifico) — Crisp, light beer cuts through the richness of fried tacos while refreshing the palate between bites.
Classic Lime Margarita — The citrus and tequila provide bright contrast to the savory, rich tacos, while the salt rim enhances all the flavors.
Horchata — This sweet, creamy rice drink with cinnamon provides cooling contrast to the crispy, savory tacos in traditional Mexican fashion.
Mexican Coca-Cola — The cane sugar sweetness and effervescence cut through the richness while complementing the comfort food nature of the dish.
Agua de Jamaica (hibiscus tea) — Tart, floral, and refreshing, this traditional drink provides palate-cleansing contrast to the fried tacos.
Beergarita — The light, refreshing beer-margarita hybrid matches the casual, fun nature of crispy fried tacos perfectly.
Tacos Dorados
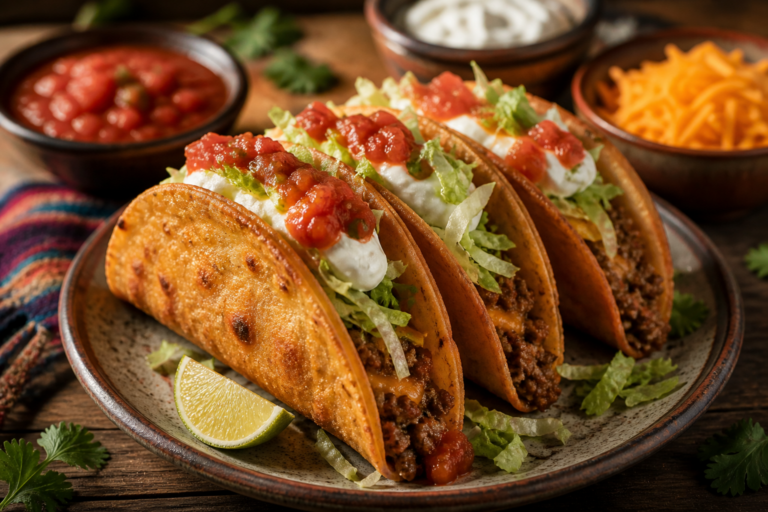
Tacos Dorados feature seasoned ground beef and melted cheese tucked into corn tortillas, then fried until golden and shatteringly crisp, topped with cool lettuce, tangy sour cream, and vibrant salsa for the ultimate crispy taco experience.
4
servings20
minutes20
minutes350
kcal40
minutesIngredients
1 pound ground beef
1 tablespoon vegetable oil
1 cup grated cheese
8 small corn tortillas
1 teaspoon ground cumin
1 teaspoon chili powder
1 cup shredded lettuce
0.5 cup sour cream
1 cup salsa
to taste salt and pepper
Directions
- Heat vegetable oil in a skillet over medium heat.
- Add ground beef, cumin, chili powder, salt, and pepper. Cook until browned, breaking it apart with a spoon.
- Warm tortillas in the microwave to make them pliable.
- Place a spoonful of beef and cheese on each tortilla, then fold in half.
- Secure with toothpicks and fry in oil until golden and crispy.
- Drain excess oil and remove toothpicks.
- Top with shredded lettuce, sour cream, and salsa before serving.
Nutrition Facts
- Total number of serves: 4
- Calories: 350kcal
- Cholesterol: 0mg
- Sodium: 620mg
- Potassium: 400mg
- Sugar: 8g
- Protein: 6g
- Calcium: 60mg
- Iron: 2mg
About This Author

Amelia Grace
Editor-in-Chief & Culinary Director
The heart and guiding voice of Daily Dish, Amelia leads our editorial vision and recipe development. With a background in food journalism and over a decade spent in professional kitchens, she has a knack for blending gourmet technique with real-world accessibility. Her goal? To make every reader feel like a confident cook, one dish at a time.
Favorite dish: Creamy lemon risotto with a sprinkle of fresh thyme.
Kitchen motto: “Good food doesn’t have to be complicated — it just has to be made with heart.”















