

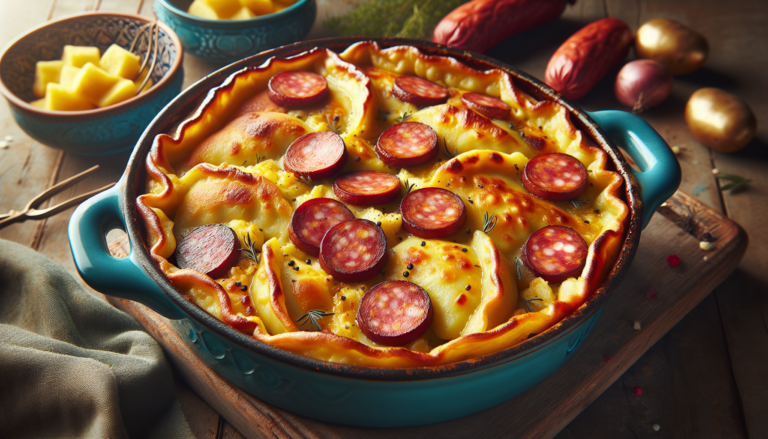
Pierogi Casserole with Kielbasa
Pierogi Casserole with Kielbasa features tender pierogis layered with sliced kielbasa, sautéed onions, and melted mozzarella cheese in a creamy sour cream sauce.
6
servings20
minutes35
minutes550
kcal55
minutesIngredients
2 cups frozen pierogis
1.5 cups sliced kielbasa
1 cup shredded mozzarella cheese
0.5 cup chopped onions
0.25 cup sour cream
0.5 cup milk
1 tbsp butter
1 tsp salt
0.5 tsp black pepper
Directions
- Preheat your oven to 375°F (190°C) and grease a 9×13 inch baking dish with butter or non-stick spray.
- Cook the frozen pierogis according to package instructions; typically this involves boiling them for several minutes until they float.
- In a skillet over medium heat, melt butter and sauté the chopped onions until they are translucent and fragrant.
- Layer the boiled pierogis in the bottom of the prepared baking dish, spreading them out evenly to cover the base.
- Arrange the sliced kielbasa over the pierogis, ensuring an even distribution across the baking dish surface.
- Combine sour cream and milk in a small bowl, then pour the mixture over the kielbasa and pierogis.
- Sprinkle shredded mozzarella cheese evenly over the top, covering the entire dish with a generous layer of cheese.
- Season with salt and black pepper, adjusting the quantities to taste before placing the dish in the oven.
- Bake at 375°F (190°C) for about 25 minutes or until the cheese is melted and bubbly with golden brown edges.
- Allow the casserole to cool for a few minutes before serving to ensure the flavors settle and it is easier to slice.
Nutrition Facts
- Total number of serves: 4
- Calories: 550kcal
- Cholesterol: 0mg
- Sodium: 620mg
- Potassium: 400mg
- Sugar: 8g
- Protein: 6g
- Calcium: 60mg
- Iron: 2mg
This Pierogi Casserole with Kielbasa transforms the beloved Polish comfort food into an easy, crowd-friendly format that delivers all the traditional flavors with minimal effort. Tender pierogis get layered with smoky, savory kielbasa slices and sweet caramelized onions, then everything gets blanketed in a creamy sour cream and milk mixture before being topped with melted mozzarella cheese. As it bakes, all the flavors meld together while the cheese turns golden and bubbly, creating a dish that’s both familiar and exciting—perfect for introducing Eastern European cuisine to your dinner table or satisfying cravings for hearty, stick-to-your-ribs comfort.


