
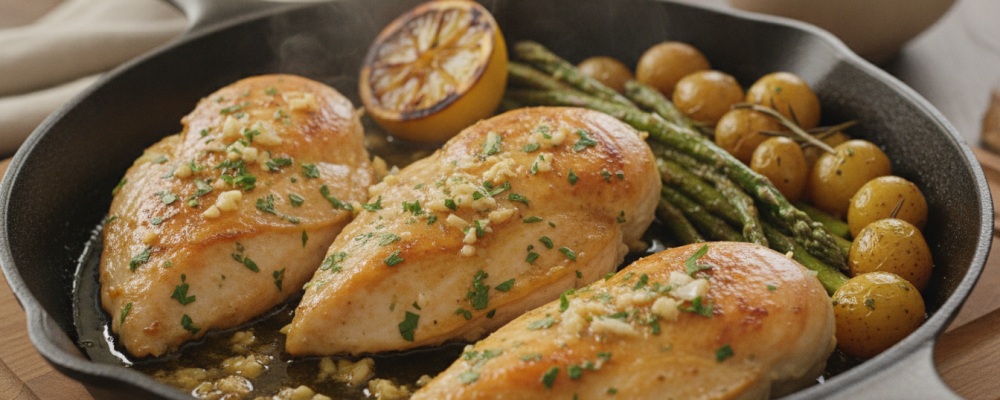

There is a version of baked chicken breast that is dry, pale, and forgettable—the one that happens when lean chicken meets a hot oven without enough fat, enough flavor, or enough attention to the basting environment it cooks in. And then there is this version. Garlic Butter Baked Chicken Breast surrounds the chicken in a seasoned mixture of melted butter, olive oil, bloomed garlic, thyme, and lemon juice before it ever touches the oven—creating a self-basting environment that keeps the breast moist, distributes flavor into the meat throughout the bake, and produces a golden, aromatic finished chicken that smells and tastes like something genuinely considered.
The combination of butter and olive oil in the basting mixture is a deliberate technique choice. Butter alone would burn at the 400°F needed to develop color on the chicken; olive oil alone would lack the richness and the milk solid browning that butter contributes to the finished surface. Together, they create a fat medium that is stable enough for high oven heat while retaining the nutty, golden character that makes butter so valuable in a basting application. The result is a chicken breast with a surface that is slightly golden, aromatic, and deeply flavorful—not the pale, steamed result that butter-only or oil-only approaches often produce.
Blooming the garlic in the butter for one minute before it goes into the basting mixture is the step that makes the garlic’s contribution distinctly different from raw. Raw garlic applied to protein and baked produces a sharp, slightly aggressive flavor that can dominate the finished dish. Garlic bloomed briefly in butter mellows and sweetens—its volatile aromatics softening into something rounded and deeply fragrant that perfumes every surface of the chicken during the bake without overpowering the thyme and lemon alongside it.
The Inspiration Behind This Recipe
This recipe draws from the French beurre meunière tradition—the practice of finishing proteins in brown butter with lemon and herbs—applied in a simplified, oven-practical format that makes it accessible to any weeknight cook. The addition of olive oil is an Italian-American practical adaptation, and the thyme echoes the herb choices of classic Provençal roasted chicken. The result is a recipe that honors multiple European traditions while being entirely practical for a Tuesday dinner.
Why 400°F Is the Right Temperature
Temperature is the most important variable in baked chicken breast, and 400°F is the specific sweet spot for this preparation. Lower temperatures—350°F or below—cook the chicken through evenly but don’t develop meaningful surface color in the twenty-five minutes the recipe requires, producing a pale result that lacks the visual appeal and the flavor concentration of the slightly golden exterior that 400°F produces. Higher temperatures—425°F or above—risk drying out the exterior before the interior reaches the correct temperature. At 400°F, with the butter and olive oil mixture continuously basting the surface throughout the bake, the chicken develops genuine golden color without losing the moisture that makes this recipe so satisfying.
Flavor Profile: What to Expect
- Slightly golden, aromatic exterior with butter and garlic flavor concentrated at the surface
- Juicy, well-seasoned chicken interior that has been basted throughout the bake
- Mellow, fragrant bloomed garlic that carries through every element of the basting mixture
- Earthy dried thyme that adds herbal warmth and a classic roasted chicken character
- Bright lemon acidity that lifts the richness of the butter and provides the finish that makes every bite feel vibrant
- Fresh parsley that adds herbal freshness and visual appeal at the finish
Tips for Making the Best Garlic Butter Baked Chicken
- Pound chicken to even thickness: An even half-inch thickness across the breast ensures the entire piece cooks through at the same rate. Thick in the center and thin at the edges produces overcooked edges before the center is done.
- Pour the butter mixture generously: Don’t reserve it—pour every drop over the chicken and make sure each breast is well-coated before it goes in the oven.
- Baste once at the midpoint: Spooning the accumulated pan juices over the chicken at the twelve-minute mark extends the basting effect and produces a noticeably more golden, flavorful surface.
- Use a thermometer: Pull at 165°F internal temperature. Chicken breast goes from perfectly cooked to dry in a very narrow window.
- Rest before serving: Three to five minutes of resting allows the juices to redistribute through the meat. Sliced immediately, they run out onto the cutting board.
Serving Suggestions and Side Pairings
- Over creamy mashed potatoes to soak up the garlic butter pan juices
- Alongside roasted asparagus or green beans for a clean, fresh vegetable contrast
- Sliced over pasta with the pan juices spooned over as a light sauce
- With warm crusty bread to mop up every drop of the basting liquid
Storage and Make-Ahead Tips
- Refrigerate for up to 4 days. The garlic butter flavor deepens as it sits.
- Reheat gently in a covered skillet over low heat with a splash of broth to restore moisture. Avoid high heat, which dries out lean chicken breast quickly.
- Freeze for up to 2 months. Thaw overnight and reheat as directed—a fresh squeeze of lemon before serving revives the brightness beautifully.
Why This Recipe Deserves a Spot in Your Rotation
Garlic Butter Baked Chicken Breast earns its rotation spot as the baked chicken recipe that actually delivers on the format’s promise—juicy, flavorful, and genuinely worth making again. Once the garlic butter basting technique is in your hands, it becomes your default approach to baked chicken breast, and the dry, flavorless versions that came before it become a problem you no longer have.
Recommended Drink Pairing
The garlic butter and lemon call for a wine with enough acidity to cut through the richness. A Pinot Grigio or a crisp Vermentino is the natural companion—clean, slightly citrusy, and structured enough to complement the thyme and garlic without overpowering the delicate chicken. For cocktails, The Perfect French 75 brings sparkling citrus elegance that echoes the lemon in the basting mixture beautifully.
For non-alcoholic options, sparkling water with lemon and fresh thyme or a cold Italian-style lemon soda keeps the palate refreshed throughout the meal.
Garlic Butter Baked Chicken Breast
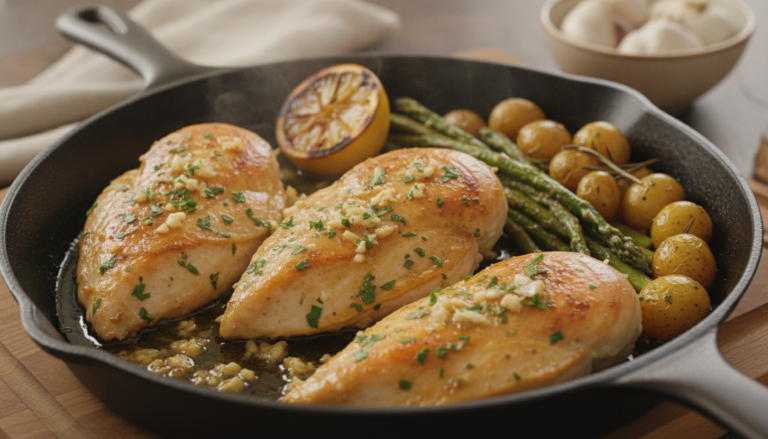
Garlic Butter Baked Chicken Breast surrounds chicken in a bloomed garlic, butter, olive oil, thyme, and lemon basting mixture and bakes at 400°F until golden and juicy—the baked chicken recipe that solves every dry, flavorless version that came before it.
4
servings10
minutes25
minutes320
kcal35
minutesIngredients
4 pieces chicken breast
4 tablespoons butter
3 cloves garlic, minced
1 teaspoon salt
1/2 teaspoon black pepper
1 teaspoon dried thyme
1 tablespoon olive oil
1 tablespoon lemon juice
2 teaspoons chopped parsley
Directions
- Preheat oven to 400°F (200°C).
- Melt butter in a small saucepan and add garlic; cook for 1 minute.
- In a bowl, combine melted butter, garlic, salt, pepper, thyme, olive oil, and lemon juice.
- Place chicken breasts in a baking dish and pour over the garlic butter mixture.
- Bake the chicken in preheated oven for 25 minutes or until cooked through and juices run clear.
- Remove from oven and let rest for a few minutes.
- Garnish with fresh parsley before serving.
Nutrition Facts
- Total number of serves: 4
- Calories: 320kcal
- Cholesterol: 0mg
- Potassium: 400mg
- Sugar: 8g
- Protein: 6g
- Calcium: 60mg
- Iron: 2mg
About This Author

Benjamin Brown
Recipe Developer
Benjamin is our flavor engineer. A classically trained chef turned recipe developer, he’s obsessed with balancing taste, texture, and creativity. He ensures that every recipe we publish is not only delicious but also reliable, approachable, and repeatable — even for beginners.
Favorite dish: Slow-braised short ribs with red wine reduction.
Kitchen motto: “Cooking is part science, part soul.”















