
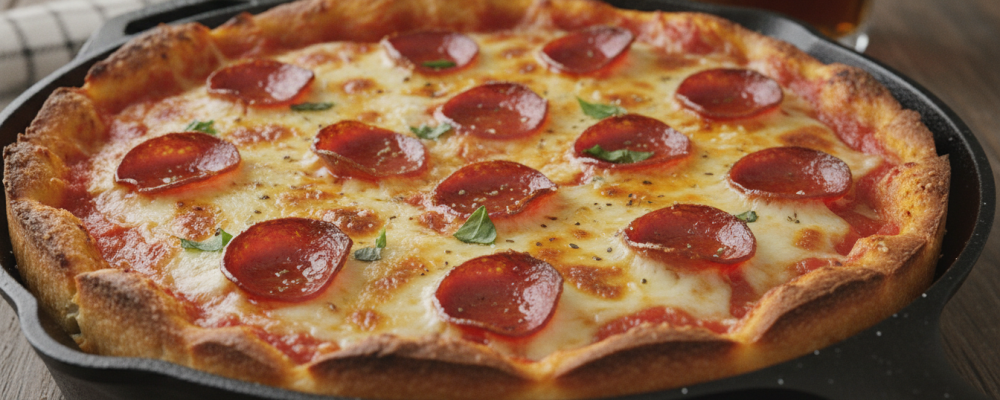

There is a version of homemade pizza that produces acceptable results, and there is a version that produces a bottom crust so shatteringly crispy and a cheese pull so satisfying that it makes you question every pizza you’ve ordered instead of made. Crispy Cast Iron Skillet Pizza is the second version. The cast iron skillet is the tool that makes this recipe genuinely exceptional—its thick walls retain heat with a consistency that no sheet pan or thin baking dish can replicate, and the stovetop-first method allows the dough’s bottom crust to develop direct, conductive heat browning before the oven ever gets involved. The result is a pizza with a crackling, deep golden underside, a properly melted cheese top, and pepperoni with the slightly curled, crisped edges that are the hallmark of a properly baked slice.
The stovetop start is the technique decision that makes this pizza fundamentally different from a standard sheet pan bake. When the dough-loaded skillet hits a preheated stovetop over medium-high heat, the cast iron’s direct, concentrated heat creates immediate, aggressive browning on the crust’s underside—the kind of caramelized, slightly charred bottom that brick ovens produce through their radiant floor heat and that a home oven alone cannot replicate from above. Five minutes on the stovetop does more for the crust’s texture and flavor than twenty additional minutes in the oven could achieve. The oven finish then melts the cheese completely and crisps the toppings without burning the bottom, since the crust is already set and golden from the stovetop stage.
The dough is the foundation of everything, and an hour of rising time is non-negotiable here. Properly proofed yeast dough has enough gas development to create a crust with the interior air bubbles that produce the chewy, slightly open crumb that distinguishes great pizza dough from cracker-like alternatives. Under-proofed dough bakes into something dense and flat; properly proofed dough bakes into something with structure and chew that can support the weight of the sauce and cheese without going soggy.
The Inspiration Behind This Recipe
This recipe draws from the Detroit-style pizza tradition—the American regional pizza style defined by its thick, rectangle or round cast iron pan, its crispy, almost fried bottom crust, and its generous cheese coverage. Detroit-style pizza was developed at Buddy’s Pizza in Detroit in 1946 using steel automotive parts pans, and the distinctive crispy bottom it produces has made it one of the most beloved regional pizza styles in the country. This recipe applies that cast iron logic to a standard round skillet in a format that any home kitchen can execute with equipment most cooks already own.
Why the Cast Iron Skillet Produces Superior Pizza
The cast iron skillet outperforms every other home pizza vessel for one fundamental reason: thermal mass. Cast iron absorbs and retains heat with a consistency that thin metal pans cannot match—once preheated, it maintains its temperature even when cold dough is placed on it, continuing to deliver consistent, high heat to the crust’s underside throughout the cooking process. This consistent heat delivery is what produces the even, deep golden browning across the entire bottom of the crust rather than the patchy, pale results that thin baking sheets and non-stick pans produce.
Flavor Profile: What to Expect
- Shatteringly crispy, deep golden bottom crust with slightly caramelized edges where the dough meets the skillet
- Chewy, airy interior crumb from properly proofed yeast dough with structure and bite
- Bold, herby tomato sauce seasoned with oregano and crushed red pepper
- Melted, bubbly mozzarella with slightly golden spots where the cheese has caramelized under the oven heat
- Crisped pepperoni with the characteristic slightly curled, browned edges that develop on properly baked pizza
Tips for Making the Best Cast Iron Skillet Pizza
- Preheat the cast iron before the dough goes in: A cold cast iron skillet won’t produce the immediate browning that defines this recipe. Heat it on the stovetop before oiling and adding the dough.
- Stretch, don’t roll: Use your hands to stretch the dough to the skillet’s edges rather than a rolling pin—rolling compresses the air bubbles developed during the rise.
- Don’t skip the stovetop stage: The five minutes of direct stovetop heat are what produce the crispy bottom. Skipping straight to the oven produces a paler, less textured result.
- Use your ears: You should hear the dough sizzling in the oiled skillet during the stovetop stage. No sizzle means the pan isn’t hot enough.
- Let it rest two minutes before slicing: This allows the cheese to set slightly and the crust to firm up, producing cleaner slices.
Serving Suggestions and Side Pairings
- With a simple arugula salad dressed in lemon vinaigrette for a classic Italian-American pairing
- Alongside garlic bread for the full pizza night experience
- With a side of marinara sauce for dipping the crust
Storage and Make-Ahead Tips
- Make the dough ahead: The dough can rise in the refrigerator overnight for even better flavor development. Bring to room temperature before shaping.
- Refrigerate leftover pizza for up to 3 days. Reheat in the cast iron skillet over medium heat for 3–4 minutes to restore the crispy bottom.
- Avoid the microwave: It turns the crust soft and rubbery instantly.
Why This Recipe Deserves a Spot in Your Rotation
Crispy Cast Iron Skillet Pizza earns its rotation spot as the homemade pizza that finally delivers on the format’s full potential—a crispy bottom, a chewy interior, and perfectly melted toppings that make it genuinely superior to most delivery options. Once the cast iron method is in your hands, it becomes the only way you want to make pizza at home.
Recommended Drink Pairing
A classic Italian pizza calls for a classic Italian wine pairing. A Chianti or a Montepulciano d’Abruzzo is the natural companion—both medium-bodied enough to complement the tomato sauce without overpowering the mozzarella. For cocktails, a Bourbon Smash brings warm citrus depth that plays surprisingly well alongside a rich, cheesy, tomato-sauced pizza.
For non-alcoholic options, a cold Italian-style blood orange soda or a sparkling water with lemon keeps the palate refreshed between slices.
Crispy Cast Iron Skillet Pizza
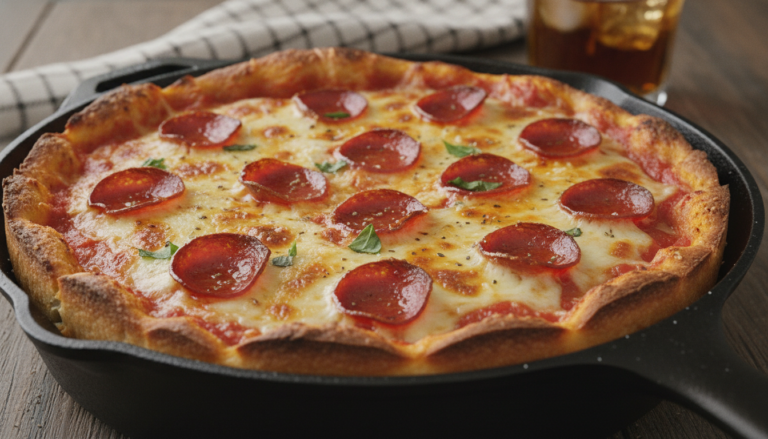
Crispy Cast Iron Skillet Pizza browns homemade dough directly on the stovetop in a preheated cast iron skillet before finishing in a 475°F oven—producing a shatteringly crispy bottom crust, properly melted cheese, and crisped pepperoni that makes this the best homemade pizza you’ll ever make.
4
servings1
hour20
minutes350
kcal1
hour20
minutesIngredients
2 cups all-purpose flour
1 cup water
1 tbsp olive oil
1 tsp salt
1 tsp active dry yeast
0.5 cup tomato sauce
1 cup mozzarella cheese, shredded
0.5 tsp dried oregano
0.25 tsp crushed red pepper
0.5 cup pepperoni slices
Directions
- In a large bowl, mix flour, salt, and yeast. Add water and olive oil and stir until a dough forms.
- Knead the dough on a floured surface for about 5-7 minutes until smooth and elastic.
- Place the dough in a lightly oiled bowl, cover, and let rise for about an hour until doubled in size.
- Preheat the oven to 475°F (245°C).
- Heat a cast iron skillet over medium-high heat and lightly coat with olive oil.
- Roll out the dough to fit the skillet and place it in, spreading it to the edges.
- Spread the tomato sauce over the dough, then add mozzarella cheese evenly on top.
- Sprinkle with oregano and crushed red pepper, then arrange pepperoni slices on top.
- Cook on the stovetop for about 5 minutes until the bottom is browned and crispy.
- Transfer the skillet to the oven and bake for 15 minutes, or until the cheese is melted and bubbly.
- Remove from the oven, let cool slightly, slice, and serve.
Nutrition Facts
- Total number of serves: 4
- Calories: 350kcal
About This Author

Benjamin Brown
Recipe Developer
Benjamin is our flavor engineer. A classically trained chef turned recipe developer, he’s obsessed with balancing taste, texture, and creativity. He ensures that every recipe we publish is not only delicious but also reliable, approachable, and repeatable — even for beginners.
Favorite dish: Slow-braised short ribs with red wine reduction.
Kitchen motto: “Cooking is part science, part soul.”















