
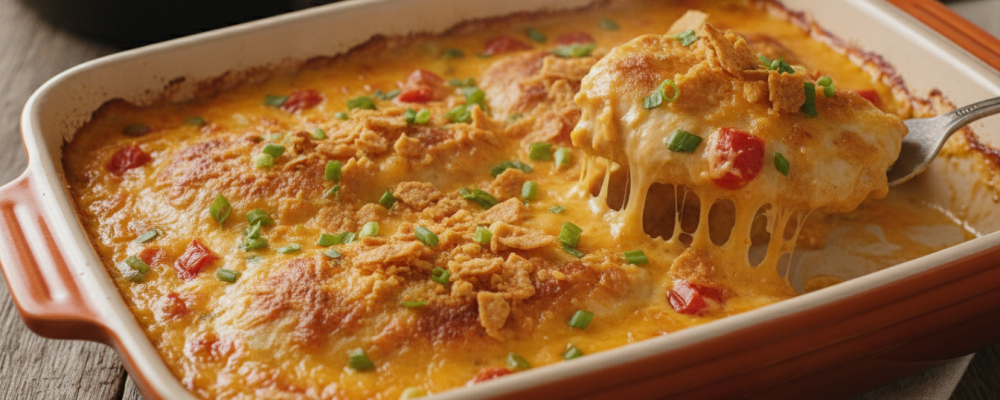

There’s a particular kind of dinner that feels indulgent without requiring much effort, and this Baked Queso Chicken is exactly that for me. A quick sear followed by a bake in queso cheese sauce turns simple chicken breasts into something rich, cheesy, and completely satisfying.
I started making this recipe on nights when I wanted something hearty but didn’t want to spend much time in the kitchen. Searing the chicken first locks in flavor and gives it a head start, but it’s baking everything together in queso that really makes this dish sing. By the time it comes out of the oven, the chicken is tender and the sauce has thickened into something you’ll want to spoon over every bite.
What I love most about this dish is how effortlessly it delivers big flavor. The queso does most of the heavy lifting, while the diced red bell pepper adds just enough freshness and color to keep the whole dish from feeling one-note.
The Inspiration Behind This Recipe
This recipe came from wanting a chicken dinner that felt a little more exciting than the usual weeknight standby, without requiring a long ingredient list. Queso cheese sauce felt like the obvious centerpiece, since it’s already rich and flavorful on its own, and baking the chicken directly in it lets the two flavors meld together in the oven.
Seasoning the chicken with chili powder and garlic powder before searing builds a flavorful base that holds its own against the richness of the queso, while the red bell pepper adds a pop of sweetness and color that keeps the dish feeling balanced rather than heavy.
This has become one of those recipes I turn to whenever I want something comforting and cheesy without much hands-on effort.
Why This Cooking Method Works
Searing the chicken briefly before baking helps develop a flavorful crust and locks in some of those spices before the queso goes on top. This step also means the chicken starts cooking on the stovetop, which helps shorten the overall baking time needed in the oven.
Pouring the queso over the chicken and baking everything together allows the sauce to gently heat through and thicken slightly as the chicken finishes cooking, rather than staying thin and separated. The red bell pepper, scattered on top before baking, softens just enough in the oven to add a slight sweetness and pop of color without turning mushy.
This method keeps the dish simple and mostly hands-off, since the oven does the bulk of the work once the chicken is seared and assembled.
Flavor Profile: What to Expect
This dish delivers a rich, cheesy, and slightly spicy flavor profile:
Rich, creamy cheesiness from the queso sauce
Warm heat from chili powder
Aromatic depth from garlic powder
Sweet, fresh contrast from red bell pepper
Savory backbone from the seared chicken
The result is a dish that’s indulgent and comforting, with just enough freshness from the bell pepper to keep it from feeling too heavy.
Tips for Making the Best Baked Queso Chicken
A few small details make a big difference here:
Sear the chicken before baking: This adds flavor and helps shorten the overall bake time.
Use a meat thermometer: Chicken breast is done at 165°F, so checking helps avoid overcooking.
Dice the bell pepper evenly: This helps it cook through at the same rate without burning.
Let the dish rest before serving: This helps the queso set slightly for easier serving.
Choose a good-quality queso: Since it’s the star of the dish, a flavorful queso makes a noticeable difference.
If you want a little extra kick, adding a diced jalapeño alongside the bell pepper is an easy way to bring more heat to the dish.
Serving Suggestions and Side Pairings
This dish is rich enough to serve with simple, complementary sides:
Mexican-style rice or cilantro-lime rice
Warm tortillas for a more casual, taco-style presentation
A simple side salad with lime vinaigrette for freshness
Tortilla chips for scooping up extra queso
Leftovers also work well shredded and folded into burritos or spooned over rice for a quick lunch.
Storage, Reheating, and Make-Ahead Tips
This recipe stores and reheats well, making it a solid option for meal prep.
Refrigerate leftovers in an airtight container for up to 3 days.
Reheat gently in the oven or microwave until warmed through, stirring the queso if needed.
Freezing is possible, though the queso’s texture may change slightly upon thawing.
You can season and sear the chicken a day in advance, refrigerating it until you’re ready to assemble and bake.
Why This Recipe Deserves a Spot in Your Rotation
This is a dish that proves a simple dinner can still feel indulgent with the right shortcut. It’s rich, cheesy, and satisfying, making it a reliable choice whenever you want comfort food without much effort. Once you’ve made it, it’s easy to see why this becomes a regular request at the dinner table.
Recommended Drink Pairing
The rich, spicy flavors of this dish pair well with a Hot Honey Margarita, whose sweet heat complements the queso and chili powder nicely. A Mexican Martini is another great option if you want something bolder and more spirit-forward.
For wine lovers, a crisp Sauvignon Blanc or a fruity Zinfandel both help balance the richness. For a non-alcoholic option, a citrus-forward agua fresca or a sparkling limeade rounds out the meal nicely.
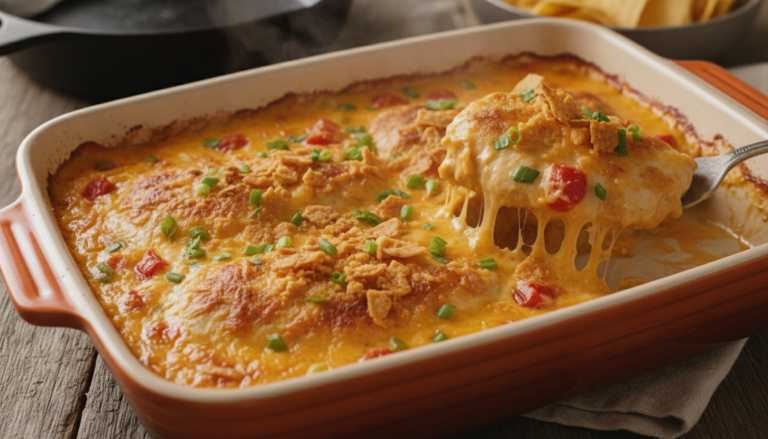
Baked Queso Chicken
Baked Queso Chicken sears seasoned chicken breasts, then bakes them in rich queso sauce with fresh bell pepper for an easy, cheesy dinner.classic.
4
servings10
minutes35
minutes450
kcal45
minutesIngredients
4 pieces chicken breast
1 cup queso cheese sauce
1 medium red bell pepper, diced
1 teaspoon chili powder
1 teaspoon garlic powder
0.5 teaspoon salt
0.5 teaspoon black pepper
1 tablespoon olive oil
Directions
- Preheat the oven to 375°F (190°C).
- Season the chicken breasts with chili powder, garlic powder, salt, and black pepper.
- Heat olive oil in a skillet over medium heat, and sear the chicken breasts for 2 minutes on each side.
- Place the seared chicken breasts in a baking dish.
- Pour queso cheese sauce over the chicken breasts.
- Scatter diced red bell pepper over the top.
- Bake in the oven for 25-30 minutes, or until the chicken is cooked through.
- Let the dish cool for a few minutes before serving.
Nutrition Facts
- Total number of serves: 4
- Calories: 450kcal
- Cholesterol: 0mg
- Potassium: 400mg
- Sugar: 8g
- Protein: 6g
- Calcium: 60mg
- Iron: 2mg
About This Author

Amelia Grace
Editor-in-Chief & Culinary Director
The heart and guiding voice of Daily Dish, Amelia leads our editorial vision and recipe development. With a background in food journalism and over a decade spent in professional kitchens, she has a knack for blending gourmet technique with real-world accessibility. Her goal? To make every reader feel like a confident cook, one dish at a time.
Favorite dish: Creamy lemon risotto with a sprinkle of fresh thyme.
Kitchen motto: “Good food doesn’t have to be complicated — it just has to be made with heart.”















