
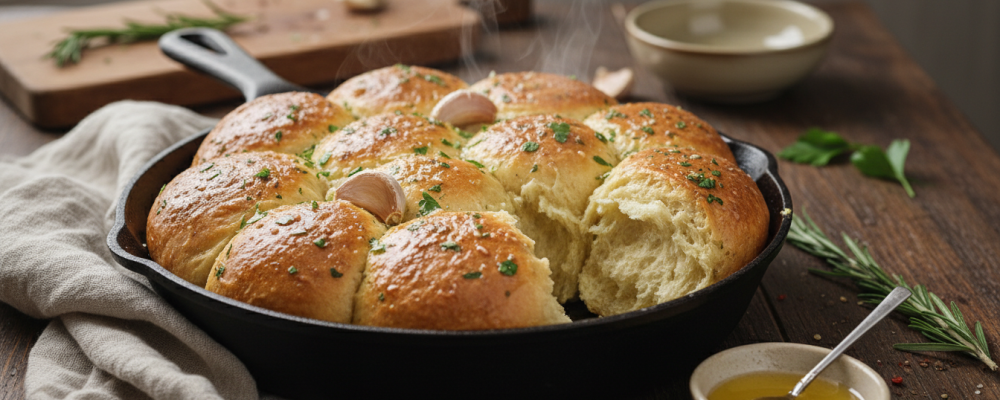

There is a particular kind of joy that comes from pulling a tray of homemade dinner rolls out of the oven—the kind that fills the entire kitchen with the scent of warm bread and toasted garlic before you’ve even set the pan down. These Garlic Butter Dinner Rolls are the ones I make when I want to turn an ordinary dinner into something that feels genuinely special. Pillowy, golden, and finished with a glossy garlic butter and fresh parsley, they have a way of disappearing from the basket before the main course even hits the table.
I started baking dinner rolls early in my career, long before I specialized in pastry, and the fundamentals have never changed: great rolls come from good dough, proper proofing, and a generous finishing butter. What I’ve refined over the years is the garlic element—not just as a garnish, but as a two-stage flavor builder. Brushing before baking lets the garlic perfume the crust as it toasts. Brushing again immediately after the oven is where the magic happens—fresh garlic butter soaks into the hot, porous crust and creates that deeply savory, glistening finish that makes these rolls irresistible.
These are the dinner rolls I bring to every holiday table and the ones guests always ask me to write down. Once you’ve made them from scratch, the store-bought version simply doesn’t compare—and the technique, once learned, becomes second nature.
The Inspiration Behind This Recipe
My inspiration for these rolls came from years of watching dinner bread be an afterthought—something tossed in a basket to fill space rather than earn it. I wanted to create a roll that was worth the seat at the table. One that people would talk about in the context of the full meal, not just reach for out of habit.
Garlic butter felt like the natural direction because it bridges sweet, pillowy bread with savory, bold flavor in a way that works alongside virtually any main course. The chopped parsley finish is a small but deliberate touch—it adds color, a whisper of herbal freshness, and signals that someone cared about the details. In baking, the details are everything.
This recipe is also a love letter to the kind of bread-baking that isn’t intimidating. No preferments, no steam injection, no specialty equipment. Just flour, yeast, butter, and patience—the same building blocks bakers have relied on for centuries.
A Brief History of Dinner Rolls
Soft, enriched dinner rolls as we know them today have their roots in European enriched bread traditions—breads made with milk, butter, and egg rather than just flour and water. These enriched doughs, sometimes called “soft rolls” or “milk rolls,” became especially popular in American cooking throughout the 19th and 20th centuries, where they became a fixture of holiday tables and family dinners alike.
The addition of garlic butter is a decidedly modern flourish—part of the broader garlic bread tradition that became a staple of Italian-American cooking and eventually found its way into home kitchens across the country. Combining the classic enriched dinner roll with a generous garlic butter finish is one of those evolutions that feels both inevitable and overdue. These rolls are the result of that happy collision.
Why This Dough and Method Work
Instant yeast makes this recipe accessible and reliable without sacrificing any of the flavor or texture that makes homemade rolls worth the effort. The warm milk and softened butter enrich the dough, creating the tender, soft crumb that separates a great dinner roll from a dense, chewy one. The egg adds structure and a subtle richness that helps the rolls hold their shape while staying light.
The two-rise method—one hour for the bulk rise, thirty minutes after shaping—is what develops both flavor and the airy, pull-apart texture that makes these rolls so satisfying. Skipping either rise will produce a denser, flatter result. Patience here is an ingredient in itself.
The double garlic butter application is a technique borrowed from professional bread baking: the pre-bake brush creates flavor in the crust, while the post-bake brush adds freshness and gloss. Together, they create depth that a single application simply can’t achieve.
Flavor Profile: What to Expect
These rolls deliver a beautifully layered eating experience:
- Soft, pillowy richness from the milk-and-butter enriched dough that melts in your mouth
- Golden, lightly crisp exterior from the oven heat and pre-bake garlic butter brush
- Bold, savory garlic that perfumes both the crust and the crumb without being sharp
- Fresh, herbal brightness from the parsley that cuts through the butter and adds a clean finish
- Subtle sweetness from the sugar in the dough that balances the savory garlic beautifully
The result is a roll that is warm, rich, garlicky, and deeply comforting—one of those foods that is almost impossible to eat just one of.
Tips for Making the Best Garlic Butter Dinner Rolls
Bread baking rewards attention to detail. These tips will set you up for success every time:
- Use warm milk, not hot: Milk that’s too hot will kill the yeast. Aim for 100–110°F—it should feel warm on your wrist, not scalding.
- Knead thoroughly: Ten minutes of hand kneading develops the gluten network that gives these rolls their structure and chew. The dough should feel smooth and elastic, not sticky.
- Don’t rush the rises: Both proof times matter. A properly doubled dough has better flavor and a lighter crumb than one that was rushed.
- Weigh your dough portions: For evenly sized rolls that bake uniformly, use a kitchen scale to divide the dough into equal pieces.
- Don’t skip the second garlic butter brush: This is the step that makes these rolls look and taste bakery-worthy. Apply it generously the moment the rolls come out of the oven while they’re still hot.
- Use fresh garlic, not garlic powder: The flavor difference in the finishing butter is significant. Fresh minced garlic bloomed in butter has a sweetness and complexity that pre-ground garlic can’t replicate.
Serving Suggestions and Side Pairings
These rolls are one of the most versatile things you can put on a dinner table. They complement nearly any main course:
- Alongside pasta dishes like a rich Alfredo or hearty tomato sauce for soaking up every last drop
- Served with soups and stews as the ideal dunking companion
- At holiday dinners alongside roasted meats, glazed ham, or prime rib
- As a side to salads for a more casual, complete meal
- Split and used as slider buns for pulled pork, meatballs, or any saucy filling
Storage, Reheating, and Make-Ahead Tips
Homemade rolls are best the day they’re made, but they store and reheat beautifully:
- Store at room temperature in an airtight bag or container for up to 3 days.
- Freeze baked rolls for up to 2 months. Thaw at room temperature and warm in the oven before serving.
- Make ahead: Shape the rolls, place on the baking sheet, cover tightly, and refrigerate overnight. Pull them out 30 minutes before baking to finish the second proof at room temperature.
- Reheat in a 300°F oven for 5–8 minutes, then brush with fresh garlic butter before serving for a just-baked finish.
Why This Recipe Deserves a Spot in Your Rotation
These rolls are the kind of recipe that becomes part of your identity as a cook. Once people experience them at your table, they become a request—a standing expectation that shows up every time you host. They’re accessible enough for a first-time bread baker and satisfying enough for someone who has been baking for years. They take an ordinary dinner and make it feel like an occasion, and in my experience, that’s the highest thing a recipe can do.
Recommended Drink Pairing
For a dinner table centerpiece like these rolls, wine works beautifully—a buttery, lightly oaked Chardonnay mirrors the richness of the garlic butter while complementing whatever main course they’re served alongside. For something lighter and more festive, The Perfect French 75 is an elegant, effervescent pairing that balances the richness of the rolls with bright citrus and bubbles.
For non-alcoholic options, a sparkling water with lemon, a light apple cider, or a warm herbal tea makes a lovely, understated companion to a bread-forward dinner spread.
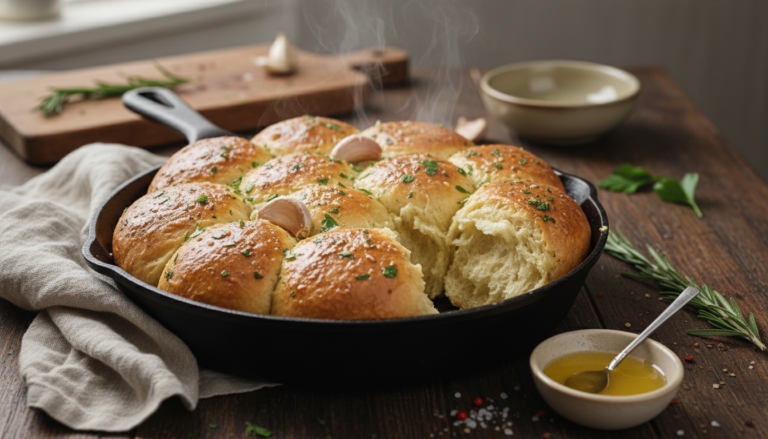
Garlic Butter Dinner Rolls
These Garlic Butter Dinner Rolls are soft, pillowy, and finished with a double coat of garlicky butter and fresh parsley—the kind of homemade bread that makes every dinner feel like a special occasion.
12
servings2
hours20
minutes250
kcal2
hours20
minutesIngredients
4 cups all-purpose flour
2 tbsp sugar
2 tsp salt
2.5 tsp instant yeast
1 cup warm milk
0.5 cup unsalted butter
1 piece egg
3 cloves garlic
2 tbsp chopped parsley
Directions
- In a large bowl, mix flour, sugar, salt, and yeast.
- Add warm milk, softened butter, and egg to the dry ingredients. Mix until a dough forms.
- Knead the dough on a floured surface for 10 minutes until smooth.
- Place dough in a greased bowl, cover, and let rise for 1 hour or until doubled.
- Punch down the dough and divide it into 12 equal pieces.
- Shape each piece into a roll and place on a greased baking sheet.
- Cover and let rise for another 30 minutes.
- Preheat the oven to 375°F (190°C).
- Melt butter in a small saucepan. Add minced garlic and cook for 1 minute.
- Brush garlic butter over the rolls.
- Bake rolls for 15-20 minutes or until golden brown.
- Brush with more garlic butter and sprinkle with chopped parsley before serving.
Nutrition Facts
- Total number of serves: 4
- Calories: 250kcal
- Cholesterol: 0mg
- Sodium: 620mg
- Potassium: 400mg
- Sugar: 8g
- Protein: 6g
- Calcium: 60mg
- Iron: 2mg
About This Author

Aurora Wright
Pastry Chef & Dessert Editor
Aurora is the sweet side of Daily Dish. A trained pastry chef and dessert stylist, she’s responsible for our mouth-watering cakes, cookies, and confections. She brings precision, artistry, and a touch of whimsy to every recipe she creates — and taste-tests more chocolate than she’ll admit.
Favorite dish: Flourless dark chocolate torte.
Kitchen motto: “Life’s too short to skip dessert.”















