Apple Pie Bars with Salted Peanut Butter Caramel

Apple Pie Bars with Salted Peanut Butter Caramel

Healthy Fact of the Day

While these Apple Pie Bars with Salted Peanut Butter Caramel are a delicious treat, they should be enjoyed in moderation as part of a balanced diet. Apples provide dietary fiber, vitamin C, and antioxidants. Peanut butter offers protein and heart-healthy monounsaturated fats. To make this recipe a bit healthier, you could reduce the sugar content, use whole wheat flour for part of the all-purpose flour, or increase the proportion of apples. You might also consider using a natural peanut butter without added sugars. Remember, desserts like this can be part of a healthy lifestyle when consumed occasionally and in appropriate portions.

Ingredients


For the crust:

  • 2 cups all-purpose flour
  • 1/2 cup granulated sugar
  • 1/4 teaspoon salt
  • 1 cup cold unsalted butter, cubed


For the apple filling:

  • 5 large apples, peeled, cored, and thinly sliced (mix of Granny Smith and Honeycrisp)
  • 1/4 cup granulated sugar
  • 1 teaspoon ground cinnamon
  • 1/4 teaspoon ground nutmeg
  • 2 tablespoons lemon juice


For the crumb topping:

  • 1 cup all-purpose flour
  • 1/2 cup brown sugar, packed
  • 1/2 cup old-fashioned oats
  • 1/2 cup cold unsalted butter, cubed


For the salted peanut butter caramel:

  • 1 cup granulated sugar
  • 1/4 cup water
  • 1/2 cup heavy cream
  • 1/4 cup creamy peanut butter
  • 1 teaspoon vanilla extract
  • 1/2 teaspoon sea salt

Instructions

  1. Preheat oven to 350°F (175°C). Line a 9×13-inch baking pan with parchment paper.

  2. For the crust, mix flour, sugar, and salt in a food processor. Add cold butter and pulse until mixture resembles coarse crumbs.

  3. Press the crust mixture into the prepared pan.

  4. Bake for 15 minutes.

  5. In a large bowl, mix sliced apples, sugar, cinnamon, nutmeg, and lemon juice.

  6. For the crumb topping, mix flour, brown sugar, and oats. Cut in cold butter until mixture is crumbly.

  7. Spread apple mixture over the pre-baked crust.

  8. Sprinkle crumb topping evenly over apples.

  9. Bake for 40-45 minutes, until top is golden and apples are tender.

  10. For the caramel, heat sugar and water in a saucepan over medium heat, swirling occasionally, until amber in color.

  11. Remove from heat, carefully add cream (it will bubble). Stir until smooth.

  12. Add peanut butter, vanilla, and salt. Stir until fully incorporated.

  13. Let bars cool completely in the pan.

  14. Drizzle with salted peanut butter caramel before cutting into squares.


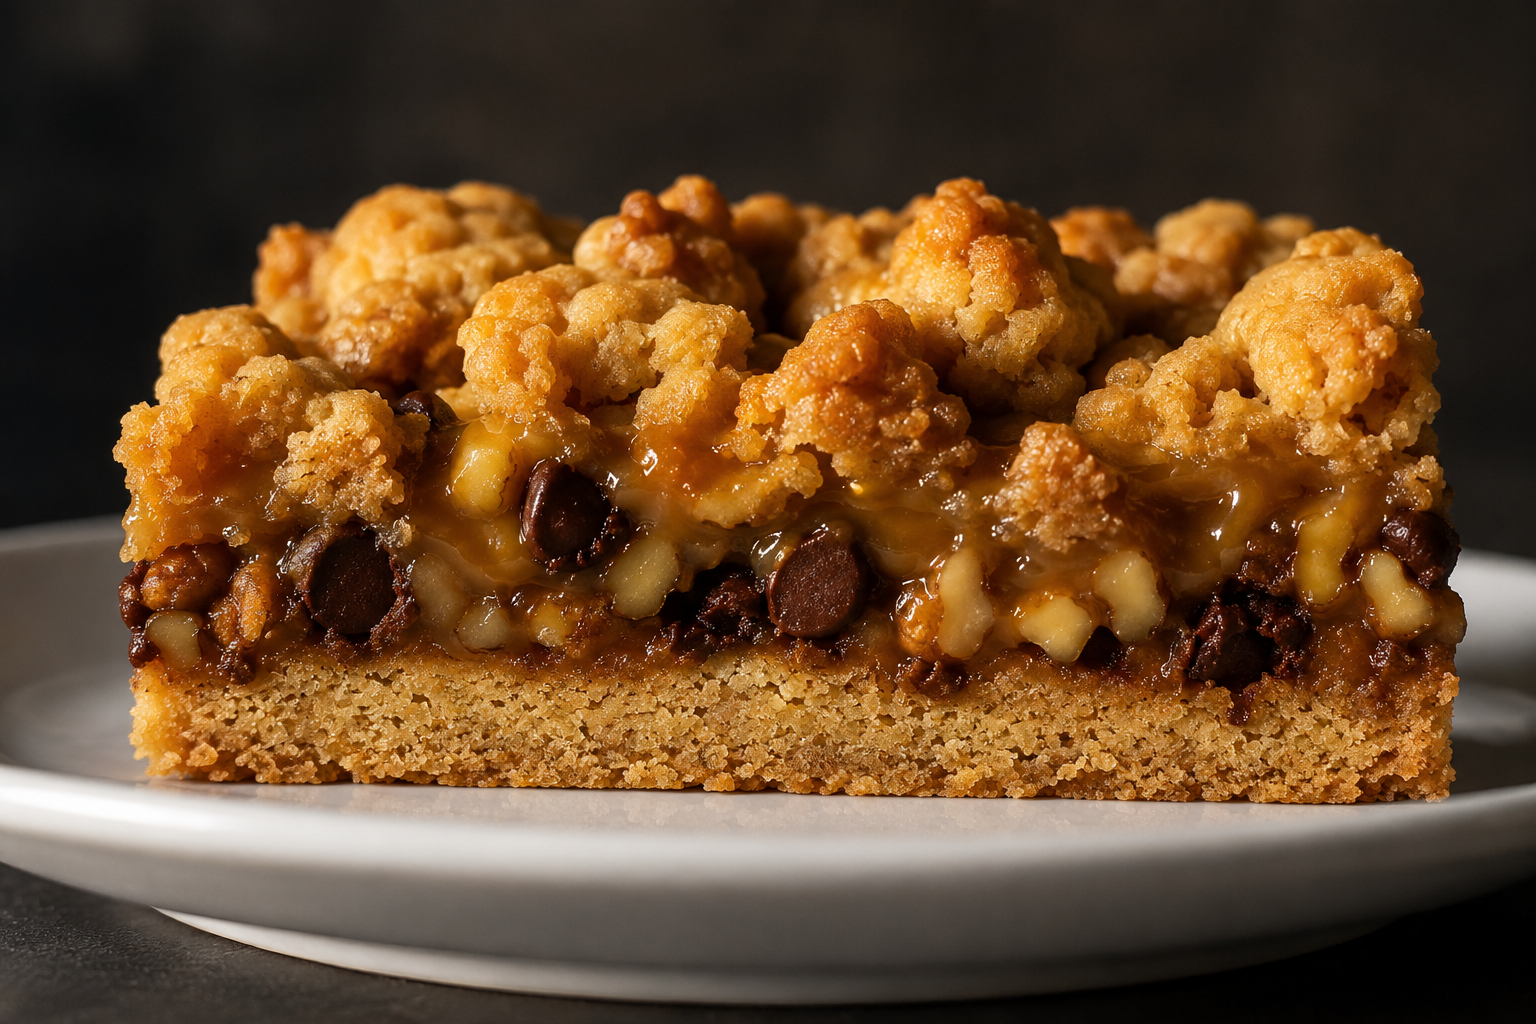
Take a bite of these Apple Pie Bars with Salted Peanut Butter Caramel and prepare for a flavor explosion that elevates the humble apple pie to new heights of indulgence! The buttery crust, tender spiced apples, and crumbly topping create a perfect base for the star of the show – that irresistible salted peanut butter caramel. It’s like combining the comfort of grandma’s apple pie with the trendy sophistication of salted caramel, all wrapped up in a convenient bar form. Whether you’re serving these at a fall gathering, bringing them to a potluck, or simply treating yourself after a long day, these bars are sure to impress. The combination of sweet, salty, and nutty flavors will dance on your taste buds, making every bite a celebration. So preheat that oven, slice those apples, and get ready to create a dessert that’s bound to become a new family favorite – it’s like capturing the essence of autumn’s bounty in one delectable, handheld treat!

Recent Recipes

The Frozen Foods Your Air Fryer Was

  • April 18, 2026
  • 3 min read

Herb and Cheese Scones

  • April 18, 2026
  • 11 min read

The Resting Rules Every Home Baker Breaks

  • April 18, 2026
  • 7 min read

Easy Pineapple Pork Chops

  • April 18, 2026
  • 10 min read

The Costco Dip That People Panicked Over

  • April 17, 2026
  • 4 min read

How Chefs Use Salt Differently Than Everyone

  • April 17, 2026
  • 7 min read

Shrimp Creole

  • April 17, 2026
  • 10 min read

Today Is the Day: Krispy Kreme’s Strawberry

  • April 16, 2026
  • 3 min read

Cherry Blossom Spritz

  • April 16, 2026
  • 10 min read

The Knife Habits That Separate Home Cooks

  • April 16, 2026
  • 7 min read

Tip of the Day

“Always let your meat rest before slicing.”

Whether you're roasting a chicken, grilling steak, or baking pork tenderloin, letting cooked meat rest for 5–10 minutes before slicing allows the juices to redistribute evenly. This simple step keeps your meat juicy and tender, ensuring every bite is flavorful and moist. Bonus: It gives you a moment to plate your sides or garnish for a perfect presentation!

Our Latest Recipes

Blog
Daily Disher

The Frozen Foods Your Air Fryer Was Born to Cook

The air fryer isn’t just a crispiness hack — it’s also a meaningful way to cut down on added fat. Most of these frozen foods come pre-oiled, which means they don’t need anything extra to get great results. Compare that to deep frying, which can add hundreds of calories per serving in absorbed oil alone. If you’re buying frozen, look for options with shorter ingredient lists and less sodium — the air fryer will do the rest without needing the extra stuff to compensate.

Read More »
Other
Benjamin Brown

Herb and Cheese Scones

Fresh herbs like parsley, thyme, and chives are packed with vitamins A, C, and K, plus antioxidants that support immune health—making these indulgent scones surprisingly nutrient-rich.

Read More »
Blog
Daily Disher

The Resting Rules Every Home Baker Breaks

Allowing bread to cool completely before slicing isn’t just a texture decision — it also affects how the body processes it. Fully cooled bread has a higher proportion of resistant starch than bread eaten warm, which slows digestion, lowers the glycemic response, and feeds beneficial gut bacteria. The same loaf, eaten at different temperatures, has a meaningfully different effect on blood sugar.

Read More »

Get your daily dose of delicious!

Skip to content