Daily Dish

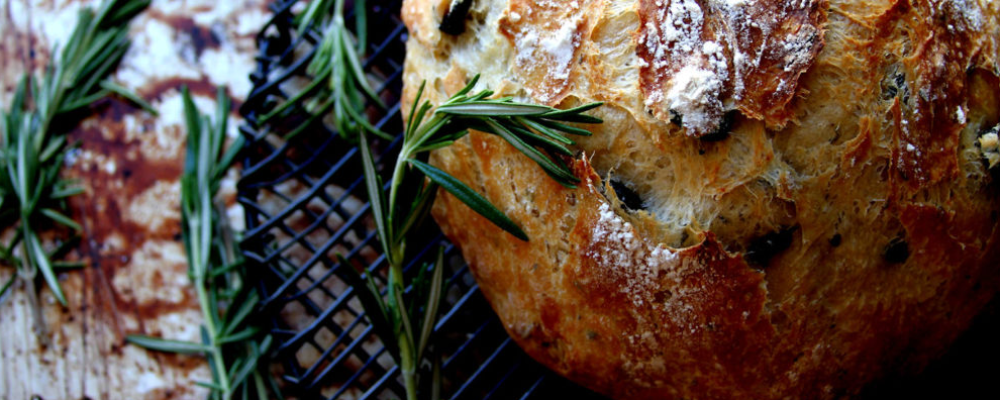
Rustic Rosemary Olive Bread Loaf

Healthy Fact of the Day

This rustic rosemary olive bread is a flavorful and nutritious option. Olives are a good source of healthy monounsaturated fats, while rosemary adds antioxidants and a distinct aroma. The whole-grain flour provides fiber and essential nutrients, making this bread a satisfying and wholesome accompaniment to any meal.

Ingredients


  • 3 cups (375g) all-purpose flour
  • 1 teaspoon salt
  • 1 teaspoon sugar
  • 1 package (2 1/4 teaspoons) active dry yeast
  • 1 1/4 cups (295ml) warm water
  • 2 tablespoons olive oil, plus more for brushing
  • 2 tablespoons chopped fresh rosemary
  • 1 cup (150g) pitted green olives, coarsely chopped


Instructions


  1. In a large bowl, whisk together the flour, salt, sugar, and yeast. Create a well in the center and pour in the warm water and olive oil.

  2. Using a wooden spoon or your hands, gradually mix the dry ingredients into the wet ingredients until a shaggy dough forms.

  3. Turn the dough out onto a lightly floured surface and knead for about 5-7 minutes, until smooth and elastic. Add the chopped rosemary and olives during the last minute of kneading, incorporating them into the dough.

  4. Place the dough in a greased bowl, cover with a damp towel or plastic wrap, and let it rise in a warm place for about 1 hour, or until doubled in size.

  5. Punch down the risen dough to release the air bubbles, then shape it into a round or oval loaf.

  6. Transfer the shaped loaf to a parchment-lined baking sheet or a greased loaf pan. Cover and let it rise for another 30 minutes.

  7. Preheat your oven to 375°F (190°C).

  8. Brush the top of the loaf with olive oil and score the top with a sharp knife or lame if desired.

  9. Bake the rosemary olive bread for 30-35 minutes, or until golden brown and hollow-sounding when tapped on the bottom.

  10. Remove the bread from the oven and let it cool on a wire rack before slicing and serving.

Enjoy a warm slice of this aromatic rosemary olive bread with a drizzle of olive oil or your favorite dipping sauce for a delightful and comforting treat!

Recent Recipes

Halibut Fish Tacos

  • October 14, 2025
  • 2 min read

Baked Italian Grinder Sandwiches

  • October 14, 2025
  • 2 min read

Cheesy Taco Sticks

  • October 13, 2025
  • 2 min read

Sticky Korean Cauliflower

  • October 13, 2025
  • 2 min read

Amish Peanut Butter Cream Pie

  • October 12, 2025
  • 2 min read

Crock Pot Mac and Cheese

  • October 12, 2025
  • 2 min read

Spicy Cheddar Jalapeño Cornbread Waffles

  • October 11, 2025
  • 1 min read

Bacon Cheddar Gnocchi Soup

  • October 11, 2025
  • 2 min read

Sweet Chili Chicken Wraps

  • October 10, 2025
  • 2 min read

Pumpkin Spice Fireball Sangria

  • October 9, 2025
  • 1 min read

Tip of the Day

“Always let your meat rest before slicing.”

Whether you're roasting a chicken, grilling steak, or baking pork tenderloin, letting cooked meat rest for 5–10 minutes before slicing allows the juices to redistribute evenly. This simple step keeps your meat juicy and tender, ensuring every bite is flavorful and moist. Bonus: It gives you a moment to plate your sides or garnish for a perfect presentation!

Our Latest Recipes

Entrees
Daily Disher

Halibut Fish Tacos

Halibut is an excellent source of lean protein and omega-3 fatty acids, which support heart and brain health. The cabbage slaw adds vitamin C and fiber while keeping the tacos light and refreshing.

Read More »
Entrees
Daily Disher

Baked Italian Grinder Sandwiches

Adding fresh lettuce and tomatoes provides vitamin C and fiber while adding satisfying crunch. The combination of different cheeses delivers calcium and protein for bone and muscle health.

Read More »
Appetizers
Daily Disher

Cheesy Taco Sticks

Ground beef provides protein and iron, while the pizza dough wrapping creates natural portion control. These sticks offer a fun way to enjoy taco flavors while sneaking in protein for growing appetites.

Read More »

Get your daily dose of delicious!

Skip to content