Daily Dish

Homemade Corn Dogs

Healthy Fact of the Day

Homemade Corn Dogs offer a fun and nostalgic treat that can be made with wholesome ingredients. By using whole-grain cornmeal and lean hot dogs, you can enjoy a lighter version of this classic fairground favorite.

Ingredients


  • 1 cup yellow cornmeal
  • 1 cup whole wheat flour
  • 2 tablespoons granulated sugar
  • 1 tablespoon baking powder
  • 1/2 teaspoon salt
  • 1 cup milk
  • 1 large egg
  • 1 tablespoon vegetable oil
  • 8 lean hot dogs
  • 8 wooden skewers or popsicle sticks
  • Vegetable oil, for frying
  •  
  •  

Instructions


  1. In a mixing bowl, combine yellow cornmeal, whole wheat flour, sugar, baking powder, and salt.

  2. In a separate bowl, whisk together milk, egg, and vegetable oil.

  3. Pour the wet ingredients into the dry ingredients and stir until just combined. The batter should be thick enough to coat the hot dogs.

  4. Insert a wooden skewer or popsicle stick into each hot dog, leaving enough for a handle.

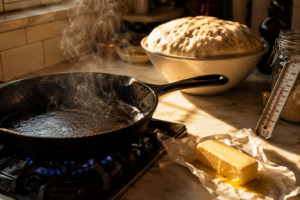
  5. Pour vegetable oil into a deep skillet or pot until it’s about 2 inches deep. Heat the oil to 350°F (175°C).

  6. Dip each hot dog into the batter, ensuring an even coating.

  7. Carefully place the coated hot dogs into the hot oil, a few at a time, and fry until golden brown (about 3-4 minutes).

  8. Use a slotted spoon to remove the corn dogs from the oil and place them on a paper towel-lined plate to drain excess oil.

  9. Repeat the process until all corn dogs are fried.

  10. Let the corn dogs cool slightly before serving.


Enjoy these Homemade Corn Dogs with your favorite dipping sauce for a delicious and nostalgic treat!

Recent Recipes

How Chefs Use Salt Differently Than Everyone

  • April 17, 2026
  • 7 min read

Shrimp Creole

  • April 17, 2026
  • 10 min read

Today Is the Day: Krispy Kreme’s Strawberry

  • April 16, 2026
  • 3 min read

Cherry Blossom Spritz

  • April 16, 2026
  • 10 min read

The Knife Habits That Separate Home Cooks

  • April 16, 2026
  • 7 min read

Greek Pasta with Feta and Olives

  • April 16, 2026
  • 10 min read

Starbucks Reveals Its Summer 2026 Menu —

  • April 15, 2026
  • 4 min read

Creamy Parmesan Beef Linguine with Garlic Butter

  • April 15, 2026
  • 11 min read

What Nobody Tells You About Cooking With

  • April 15, 2026
  • 6 min read

Chicken Stroganoff

  • April 15, 2026
  • 9 min read

Tip of the Day

“Always let your meat rest before slicing.”

Whether you're roasting a chicken, grilling steak, or baking pork tenderloin, letting cooked meat rest for 5–10 minutes before slicing allows the juices to redistribute evenly. This simple step keeps your meat juicy and tender, ensuring every bite is flavorful and moist. Bonus: It gives you a moment to plate your sides or garnish for a perfect presentation!

Our Latest Recipes

Blog
Daily Disher

How Chefs Use Salt Differently Than Everyone Else

Cooking with kosher or sea salt rather than table salt can support modest sodium reduction without sacrificing perceived saltiness — the larger crystals make contact with taste receptors more efficiently on the surface of food, meaning less salt can deliver a comparable seasoning effect when used as a finish. Tasting and adjusting during cooking rather than at the table also tends to result in lower overall sodium use, since food seasoned throughout requires less correction at the end.

Read More »
Entrees
Benjamin Brown

Shrimp Creole

Shrimp is one of the leanest, most protein-dense seafood options available, delivering high-quality protein and essential minerals like iodine, selenium, and zinc with minimal calories and virtually no saturated fat. The holy trinity of onion, bell pepper, and celery adds fiber, vitamins, and powerful antioxidants to every bowl—making this bold, deeply satisfying Creole classic a genuinely nutritious choice that never tastes like one.

Read More »
Blog
Daily Disher

Today Is the Day: Krispy Kreme’s Strawberry Original Glazed Is Back — But Only Until Sunday

Treating yourself to a seasonal favorite is one of life’s small pleasures — the key is keeping it just that, a treat. If you’re grabbing a dozen, consider sharing with coworkers, neighbors, or family rather than going it alone. Enjoying one or two doughnuts mindfully and savoring the experience beats eating through a box on autopilot. And if you’re picking up two dozen thanks to the deal, your freezer is a surprisingly good short-term storage option — doughnuts freeze well for up to two months when wrapped tightly.

Read More »

Get your daily dose of delicious!

Skip to content