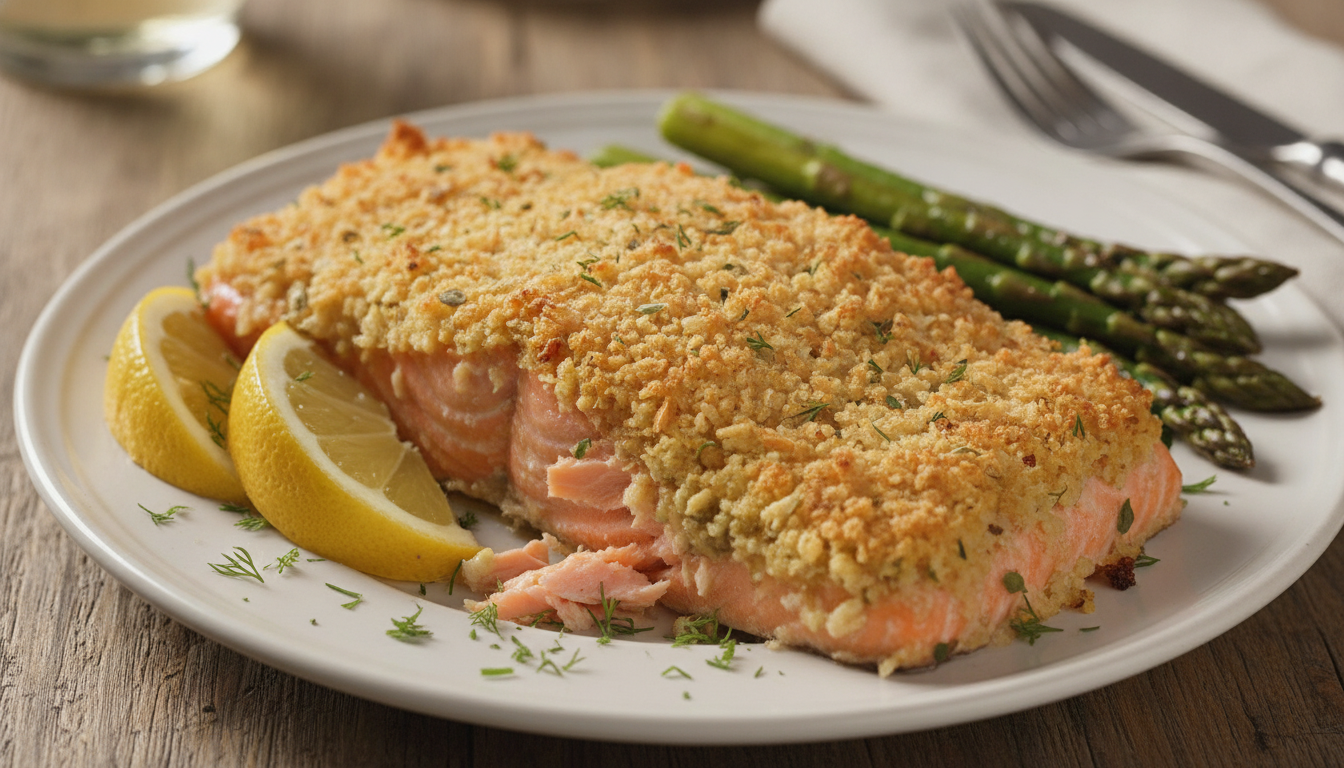
Daily Dish

Crispy Dill Tilapia

Healthy Fact of the Day

Tilapia is a lean source of protein that is low in calories and high in essential nutrients like vitamin B12, niacin, and selenium. The addition of fresh dill also provides a boost of antioxidants and flavor.

Ingredients


  • 4 tilapia fillets
  • 1 cup panko breadcrumbs
  • 1/4 cup grated Parmesan cheese
  • 2 tablespoons chopped fresh dill
  • 1 teaspoon garlic powder
  • 1 teaspoon paprika
  • 1/2 teaspoon salt
  • 1/4 teaspoon black pepper
  • 2 eggs, beaten
  • 2 tablespoons olive oil or melted butter


Instructions

  1. Preheat your oven to 400°F (200°C). Line a baking sheet with parchment paper or foil.

  2. In a shallow dish, combine the panko breadcrumbs, grated Parmesan cheese, chopped fresh dill, garlic powder, paprika, salt, and black pepper. Mix well.

  3. Place the beaten eggs in a separate shallow dish.

  4. Dip each tilapia fillet into the beaten eggs, allowing any excess to drip off.

  5. Coat the fish fillets evenly with the seasoned breadcrumb mixture, pressing gently to adhere the coating.

  6. Arrange the coated tilapia fillets on the prepared baking sheet and drizzle or brush with olive oil or melted butter.

  7. Bake in the preheated oven for 12-15 minutes, or until the fish is opaque and the breadcrumb coating is golden brown and crispy.

  8. Serve hot, garnished with additional fresh dill sprigs if desired.

Enjoy this crispy and flavorful dill tilapia dish, a delightful way to incorporate more fish into your diet while indulging in a satisfying crunch.

Recent Recipes

Chipotle Honey Chicken Thighs with Gouda Mashed

  • February 25, 2026
  • 11 min read

McDonald’s Biggest Burger Ever Is Finally Coming

  • February 25, 2026
  • 5 min read

The Searing Mistake That Keeps Your Meat

  • February 25, 2026
  • 8 min read

Teriyaki Pineapple Chicken & Rice Stuffed Peppers

  • February 25, 2026
  • 8 min read

Air Fryer Mexican Potato Tacos

  • February 24, 2026
  • 8 min read

Aldi Recalls Nearly 10,000 Pounds of Frozen

  • February 24, 2026
  • 7 min read

Why Restaurant Rice Never Turns Out Mushy

  • February 24, 2026
  • 8 min read

Easy Crock Pot Ramen

  • February 24, 2026
  • 8 min read

A&W Is Launching Root Beer Float Flavor

  • February 23, 2026
  • 7 min read

30-Minute Pizza Bombs

  • February 23, 2026
  • 9 min read

Tip of the Day

“Always let your meat rest before slicing.”

Whether you're roasting a chicken, grilling steak, or baking pork tenderloin, letting cooked meat rest for 5–10 minutes before slicing allows the juices to redistribute evenly. This simple step keeps your meat juicy and tender, ensuring every bite is flavorful and moist. Bonus: It gives you a moment to plate your sides or garnish for a perfect presentation!

Our Latest Recipes

Blog
Daily Disher

McDonald’s Biggest Burger Ever Is Finally Coming to America

Healthy Tip: Indulging in a burger doesn’t have to derail your goals. When enjoying a larger meal, balance it out by skipping the sugary drink and opting for water instead — you’ll save anywhere from 150 to 300 calories without sacrificing satisfaction. Staying mindful of portion size and pairing rich foods with lighter choices throughout the rest of your day can help you enjoy the occasional treat without guilt.

Read More »
Blog
Avery Perez

The Searing Mistake That Keeps Your Meat From Browning

A proper sear at high heat creates the Maillard reaction which develops complex flavors without requiring heavy sauces or excessive added fats, and searing meat quickly at the right temperature helps retain more moisture and nutrients inside compared to slow cooking at lower temperatures where juices gradually seep out.

Read More »

Get your daily dose of delicious!

Skip to content