Daily Dish

Homemade Bagels

Healthy Fact of the Day

Homemade bagels can be a nutritious option when made with whole-grain flour, as they provide complex carbohydrates, fiber, and potential toppings like seeds or onions can add additional nutrients and flavors.

Ingredients


  • 1 1/4 cups warm water (105-115°F)
  • 1 tablespoon sugar
  • 1 teaspoon salt
  • 1 package active dry yeast (2 1/4 teaspoons)
  • 3 1/2 cups all-purpose flour, plus more for dusting
  • 1 tablespoon honey or barley malt syrup (optional)
  • Toppings: sesame seeds, poppy seeds, dried onion flakes, etc. (optional)


Instructions

  1. In a large bowl, combine the warm water, sugar, salt, and yeast. Let the mixture stand for 5-10 minutes until it becomes frothy and foamy.

  2. Add 3 cups of flour to the yeast mixture and stir with a wooden spoon until a shaggy dough forms.

  3. Turn the dough out onto a lightly floured surface and knead for about 10 minutes, gradually adding the remaining 1/2 cup of flour as needed, until the dough is smooth, elastic, and not too sticky.

  4. Place the dough in a lightly greased bowl, cover with a damp cloth or plastic wrap, and let it rise in a warm place for 1 hour, or until doubled in size.

  5. Punch down the dough to release the air bubbles and divide it into 8 equal pieces.

  6. Roll each piece into a smooth ball and use your thumb to poke a hole in the center, stretching the dough into a bagel shape with a hole in the middle.

  7. Place the shaped bagels on a parchment-lined baking sheet and let them rest for 10 minutes.

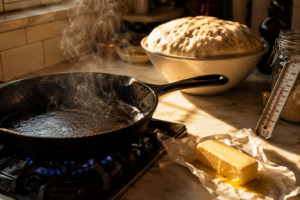
  8. Meanwhile, preheat your oven to 425°F (220°C) and bring a large pot of water to a boil. Add the honey or barley malt syrup to the boiling water (if using).

  9. Boil the bagels for 1 minute per side, then transfer them back to the parchment-lined baking sheet.

  10. If desired, top the bagels with sesame seeds, poppy seeds, dried onion flakes, or any other toppings of your choice.

  11. Bake the bagels for 18-22 minutes, or until golden brown.

  12. Remove the bagels from the oven and let them cool on a wire rack before serving.

Enjoy these delectable doughy bagels, perfect for brightening up your morning! 

Recent Recipes

USDA Issues Public Health Alert for White

  • March 25, 2026
  • 4 min read

Lemon Butter Scallops

  • March 25, 2026
  • 11 min read

Why Your Caramelized Onions Never Get Dark

  • March 25, 2026
  • 9 min read

Easy Greek Chicken Pasta

  • March 25, 2026
  • 9 min read

Burger King Is Dropping a New Customer-Created

  • March 24, 2026
  • 4 min read

Albondigas Tacos

  • March 24, 2026
  • 9 min read

The Coffee Brewing Mistake That Makes Everything

  • March 24, 2026
  • 9 min read

Slow Cooker Beef & Broccoli

  • March 24, 2026
  • 9 min read

Air Fryer Parmesan Truffle Fries

  • March 23, 2026
  • 10 min read

Why Your Homemade Pizza Dough Is Always

  • March 23, 2026
  • 9 min read

Tip of the Day

“Always let your meat rest before slicing.”

Whether you're roasting a chicken, grilling steak, or baking pork tenderloin, letting cooked meat rest for 5–10 minutes before slicing allows the juices to redistribute evenly. This simple step keeps your meat juicy and tender, ensuring every bite is flavorful and moist. Bonus: It gives you a moment to plate your sides or garnish for a perfect presentation!

Our Latest Recipes

Blog
Daily Disher

USDA Issues Public Health Alert for White Oak Pastures Ground Beef Over Possible Metal Contamination

Food safety alerts like this one are a good reminder to periodically check the dates on frozen meat in your freezer. Ground beef can be safely frozen for up to four months, but products stored beyond their sell-by date — especially those purchased from specialty or organic retailers — can be easy to lose track of. Make it a habit to label frozen meat with the purchase date and rotate older items to the front so nothing gets forgotten in the back of the freezer.

Read More »
Chicken Recipes
Daily Disher

Lemon Butter Scallops

Scallops are an excellent source of lean protein, vitamin B12, and omega-3 fatty acids while remaining naturally low in calories and fat—making them a guilt-free indulgence.

Read More »
Blog
Daily Disher

Why Your Caramelized Onions Never Get Dark Enough

Properly caramelized onions develop complex flavors that reduce the need for added salt, sugar, or fats in finished dishes, and the long, slow cooking process breaks down the onions’ fructans—compounds that can cause digestive discomfort in raw or lightly cooked onions—making them easier to digest while concentrating their natural antioxidants and anti-inflammatory compounds.

Read More »

Get your daily dose of delicious!

Skip to content