Daily Dish

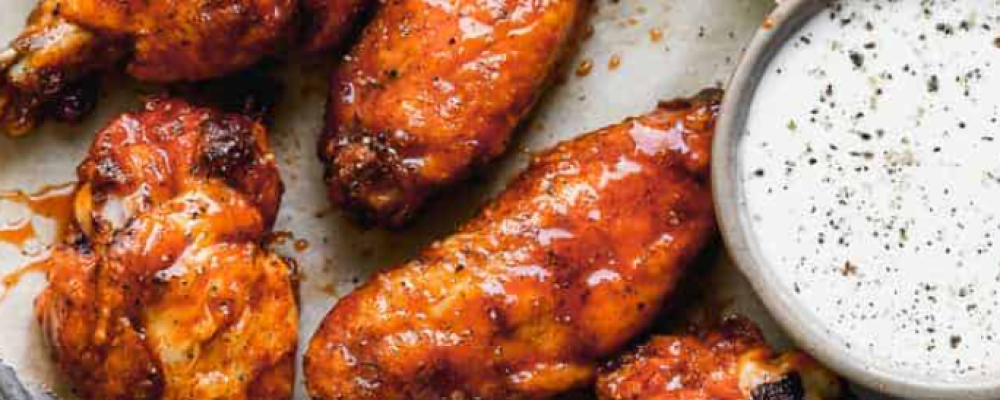
Crispy Baked Chicken Wings

Healthy Fact of the Day

Crispy Baked Chicken Wings provide the irresistible crunch of traditional wings without the deep frying. This recipe uses baking instead of frying, reducing the overall fat content. Paired with a flavorful glaze, these wings make for a tasty and healthier alternative.

Ingredients


For the Chicken Wings:

  • 2 lbs chicken wings, split at joints, tips discarded
  • 1 tablespoon baking powder
  • 1/2 teaspoon salt
  • 1/2 teaspoon black pepper


For the Glaze:

  • 1/4 cup honey
  • 2 tablespoons soy sauce
  • 1 tablespoon Sriracha sauce (adjust to taste)
  • 1 tablespoon rice vinegar
  • 1 teaspoon sesame oil
  • Sesame seeds and chopped green onions for garnish
  •  
  •  

Instructions


  1. Preheat your oven to 425°F (220°C). Line a baking sheet with parchment paper.

  2. Pat the chicken wings dry with paper towels to remove excess moisture.

  3. In a bowl, toss the wings with baking powder, salt, and black pepper until evenly coated.

  4. Place the wings on the prepared baking sheet in a single layer, making sure they are not touching.

  5. Bake in the preheated oven for 45-50 minutes or until the wings are golden brown and crispy.

  6. While the wings are baking, prepare the glaze. In a small saucepan, combine honey, soy sauce, Sriracha sauce, rice vinegar, and sesame oil. Heat over medium heat, stirring until the mixture thickens slightly.

  7. Once the wings are done, transfer them to a large bowl.

  8. Pour the glaze over the wings and toss until they are evenly coated.

  9. Garnish with sesame seeds and chopped green onions.

  10. Serve the Crispy Baked Chicken Wings immediately with extra glaze on the side for dipping.


Enjoy these delicious wings that strike the perfect balance between crispy and saucy!

Recent Recipes

Stuffed Italian Meatloaf

  • August 27, 2026
  • 6 min read

Why You’re Supposed to Let Meat Rest

  • August 27, 2026
  • 4 min read

French Onion Steak Pinwheels

  • August 27, 2026
  • 13 min read

Slow Cooker Chicken Shawarma

  • August 27, 2026
  • 6 min read

Most Olive Oil Labels Are Telling You

  • August 27, 2026
  • 4 min read

Air Fryer Coconut Shrimp Tacos

  • August 27, 2026
  • 11 min read

One Pot Beef & Noodles

  • August 27, 2026
  • 5 min read

The Dish You Make When You Don’t

  • August 27, 2026
  • 4 min read

Loaded Taco Deviled Eggs

  • August 27, 2026
  • 13 min read

Baked Queso Chicken

  • August 27, 2026
  • 6 min read

Tip of the Day

“Always let your meat rest before slicing.”

Whether you're roasting a chicken, grilling steak, or baking pork tenderloin, letting cooked meat rest for 5–10 minutes before slicing allows the juices to redistribute evenly. This simple step keeps your meat juicy and tender, ensuring every bite is flavorful and moist. Bonus: It gives you a moment to plate your sides or garnish for a perfect presentation!

Our Latest Recipes

Entrees
Benjamin Brown

Stuffed Italian Meatloaf

Spinach adds iron, fiber, and vitamins to this dish, sneaking in extra nutrition without changing the comforting, cheesy flavor everyone loves.

Read More »
Blog
Daily Disher

Why You’re Supposed to Let Meat Rest (And What Happens If You Don’t)

Letting meat rest before slicing helps retain more of its natural juices, which also means retaining more of the B vitamins and minerals like iron and zinc that would otherwise be lost onto the cutting board — and resting meat away from direct heat also reduces the formation of certain compounds linked to prolonged high-heat exposure.

Read More »
Entrees
Amelia Grace

French Onion Steak Pinwheels

Flank steak is a naturally lean cut rich in protein, iron, and zinc—caramelized onions develop deep sweetness without any added sugar, making this an indulgent-tasting dish that’s more nutritious than it appears.

Read More »

Get your daily dose of delicious!

Skip to content













