Daily Dish

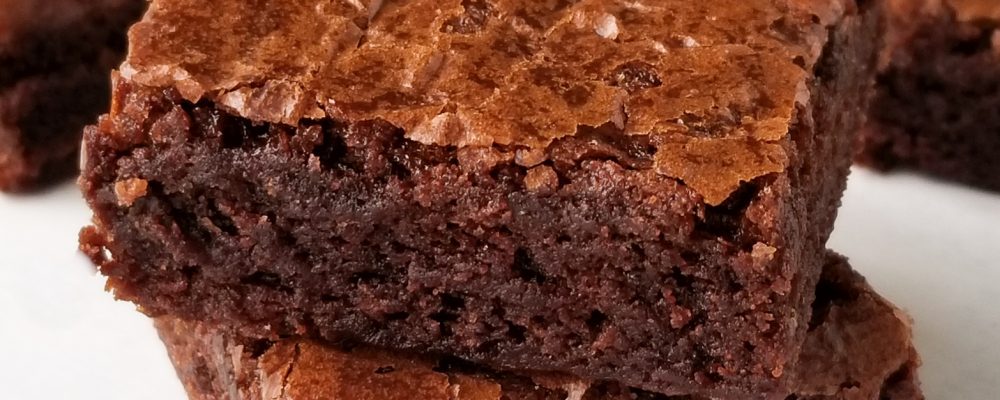
Classic Chocolate Brownies

Healthy Fact of the Day

While dessert should be enjoyed in moderation, these classic chocolate brownies can be a delightful treat. Dark chocolate contains antioxidants and may offer some health benefits when consumed in moderation.

Ingredients

  • 1 cup (2 sticks) unsalted butter
  • 2 cups granulated sugar
  • 4 large eggs
  • 1 teaspoon pure vanilla extract
  • 1 cup all-purpose flour
  • 3/4 cup unsweetened cocoa powder
  • 1/2 teaspoon baking powder
  • 1/2 teaspoon salt
  • 1 cup semi-sweet chocolate chips
  • 1/2 cup chopped walnuts (optional)
  • Powdered sugar for dusting (optional)


Instructions


  1. Preheat your oven to 350°F (175°C). Grease a 9×13-inch baking pan.
  2. In a medium saucepan, melt the butter over low heat. Stir in the granulated sugar until well combined. Remove from heat and let it cool slightly.
  3. In a separate bowl, beat the eggs and vanilla extract together.
  4. In another bowl, whisk together the flour, cocoa powder, baking powder, and salt.
  5. Gradually add the egg mixture to the melted butter and sugar, stirring well after each addition.
  6. Add the dry ingredient mixture to the wet ingredients, stirring until just combined.
  7. Fold in the semi-sweet chocolate chips and chopped walnuts (if using).
  8. Pour the brownie batter into the prepared baking pan and spread it evenly.
  9. Bake in the preheated oven for 25-30 minutes, or until a toothpick inserted into the center comes out with a few moist crumbs (but not wet).
  10. Remove the brownies from the oven and let them cool in the pan on a wire rack.
  11. Once the brownies have cooled, you can dust them with powdered sugar if desired.
  12. Cut into squares and serve your Classic Chocolate Brownies as a sweet and indulgent treat.


These classic chocolate brownies are a beloved dessert that’s perfect for satisfying your sweet tooth. Enjoy the rich, chocolatey goodness!


Recent Recipes

Chick-fil-A Just Launched a Chicken and Waffles

  • August 26, 2026
  • 2 min read

Crispy Garlic Parmeson Pork Tenderloin

  • August 26, 2026
  • 12 min read

The Whole Fish: Why Cooking It on

  • August 26, 2026
  • 10 min read

Tequila Lime Chicken

  • August 26, 2026
  • 6 min read

Taco Bell Just Brought Back Four Menu

  • August 25, 2026
  • 2 min read

Sweet Potato Tacos with Avocado Salsa

  • August 25, 2026
  • 11 min read

The Art of the Cheese Sauce: What

  • August 25, 2026
  • 10 min read

Mushroom and Spinach Lasagna Rolls

  • August 25, 2026
  • 6 min read

Dutch Bros Just Launched Its 2026 Fall

  • August 24, 2026
  • 2 min read

Marshmallow Caramel Corn

  • August 24, 2026
  • 13 min read

Tip of the Day

“Always let your meat rest before slicing.”

Whether you're roasting a chicken, grilling steak, or baking pork tenderloin, letting cooked meat rest for 5–10 minutes before slicing allows the juices to redistribute evenly. This simple step keeps your meat juicy and tender, ensuring every bite is flavorful and moist. Bonus: It gives you a moment to plate your sides or garnish for a perfect presentation!

Our Latest Recipes

Blog
Daily Disher

Chick-fil-A Just Launched a Chicken and Waffles Sandwich — Plus Two S’mores Drinks

Sandwiches that combine fried protein, syrup, and butter-based spreads can add up quickly in calories and added sugar, especially when paired with a milkshake-style drink. If you’re ordering something like a chicken and waffles sandwich, consider going light on the syrup, choosing the grilled filet option instead of fried, or splitting a dessert drink with someone else at the table. Pairing a heavier meal with water instead of a second sugary beverage is also an easy way to keep things balanced.

Read More »
Entrees
Amelia Grace

Crispy Garlic Parmeson Pork Tenderloin

Pork tenderloin is one of the leanest cuts of meat, comparable to skinless chicken breast in fat content—use part-skim Parmesan and reduce olive oil slightly for an even lighter version without sacrificing that gorgeous golden crust.

Read More »
Blog
Daily Disher

The Whole Fish: Why Cooking It on the Bone Changes Everything

Fish cooked on the bone retains slightly higher concentrations of omega-3 fatty acids than fish that has been filleted and stored before cooking — because the fat in the flesh adjacent to the bone is protected from oxidation by the bone itself during the period between filleting and cooking. Whole fish also provides the specific opportunity to consume the collar and the cheek — the two portions most consistently identified by fish-eating cultures worldwide as the most flavorful and most fatty, and therefore the most omega-3-rich, parts of the fish.

Read More »

Get your daily dose of delicious!

Skip to content












