

While I usually find myself elbow-deep in flour creating sweet treats, I have to confess my absolute adoration for these 30-Minute Pizza Bombs. There’s something magical about working with dough—whether it’s laminated pastry or humble biscuit dough—and these little gems remind me why I fell in love with baking in the first place. It’s all about transformation: taking simple ingredients and creating something that’s more than the sum of its parts.
What draws me to this recipe is the same thing that makes great pastry work: it’s about encasing delicious fillings in a perfectly golden exterior. The technique here mirrors what we do with hand pies or empanadas—seal in all that goodness so every bite is a surprise of melty cheese and savory filling. And that herb butter brush at the end? Chef’s kiss. It’s the kind of finishing touch that elevates something simple into something special.
I love how forgiving this recipe is, too. Biscuit dough is incredibly user-friendly—it doesn’t require the precision of puff pastry or the patience of yeast dough. You can have these in the oven before your oven even finishes preheating, and fifteen minutes later, you’re pulling out golden, bubbling perfection. It’s instant gratification in the best possible way.
These pizza bombs have become my go-to for casual entertaining. They’re fun, they’re interactive, and they disappear faster than you can say “pepperoni.” Plus, they’re absolutely adorable lined up on a platter, all golden and glossy. Who says savory food can’t be just as visually delightful as dessert?
─────────
The Inspiration Behind This Recipe
Pizza Bombs emerged from the brilliant idea of making pizza portable and portion-controlled without sacrificing any of the flavor. The concept takes inspiration from various stuffed dough traditions around the world—from Italian calzones to Argentinian empanadas to Chinese bao—but simplifies the process dramatically by using store-bought biscuit dough as a shortcut.
The beauty of this recipe lies in its accessibility. Not everyone has time to make pizza dough from scratch or the confidence to work with yeast, but nearly everyone can open a can of biscuits and stuff them with their favorite pizza toppings. It’s genius in its simplicity: all the satisfaction of homemade pizza with a fraction of the effort. The individual portion format also makes them perfect for parties, lunch boxes, or those nights when everyone in the family wants to eat at different times.
─────────
A Brief History of Stuffed Dough Creations
Humans have been stuffing dough with savory fillings for thousands of years across virtually every culture. From ancient Roman pastries to medieval meat pies, the concept of encasing ingredients in dough for portability and flavor has endured. Pizza itself originated in Naples, Italy, in the 18th century, evolving from flatbreads topped with simple ingredients.
The modern American “pizza bomb” or “pizza pocket” concept gained popularity in home kitchens during the 2010s as food bloggers began experimenting with shortcut ingredients like refrigerated biscuit dough. These recipes represented a fusion of convenience culture and comfort food nostalgia—a way to capture restaurant flavors at home with minimal effort. The technique also echoes commercial products like Hot Pockets and Pizza Rolls, but with fresher ingredients and customizable fillings that home cooks could control.
─────────
Why This Cooking Method Works
Refrigerated biscuit dough is the hero ingredient here. It’s pre-leavened with baking powder and contains fat that creates tender, flaky layers when baked. The dough is pliable enough to stretch and seal around fillings without tearing, yet sturdy enough to contain melty ingredients without leaking.
Flattening the biscuits creates surface area for filling while maintaining enough dough to seal properly. Too thick and they won’t seal; too thin and they’ll tear or leak during baking.
Moderate oven temperature (375°F) ensures the biscuits bake through completely while achieving golden browning. Higher temperatures would brown the exterior before the dough cooked through; lower temperatures would result in pale, dense bombs.
Seam-side down placement is crucial. Gravity helps keep the seam sealed during baking, preventing cheese and sauce from bubbling out. The weight of the filling pressing against the sealed dough also helps maintain closure.
Butter and herb brush serves multiple purposes: it promotes golden browning, adds flavor, and creates an attractive glossy finish. The fat in the butter also helps the Parmesan adhere.
Slight cooling time allows the molten cheese inside to set just enough that you won’t burn your mouth on the first bite, while maintaining that desirable gooeyness.
─────────
Flavor Profile: What to Expect
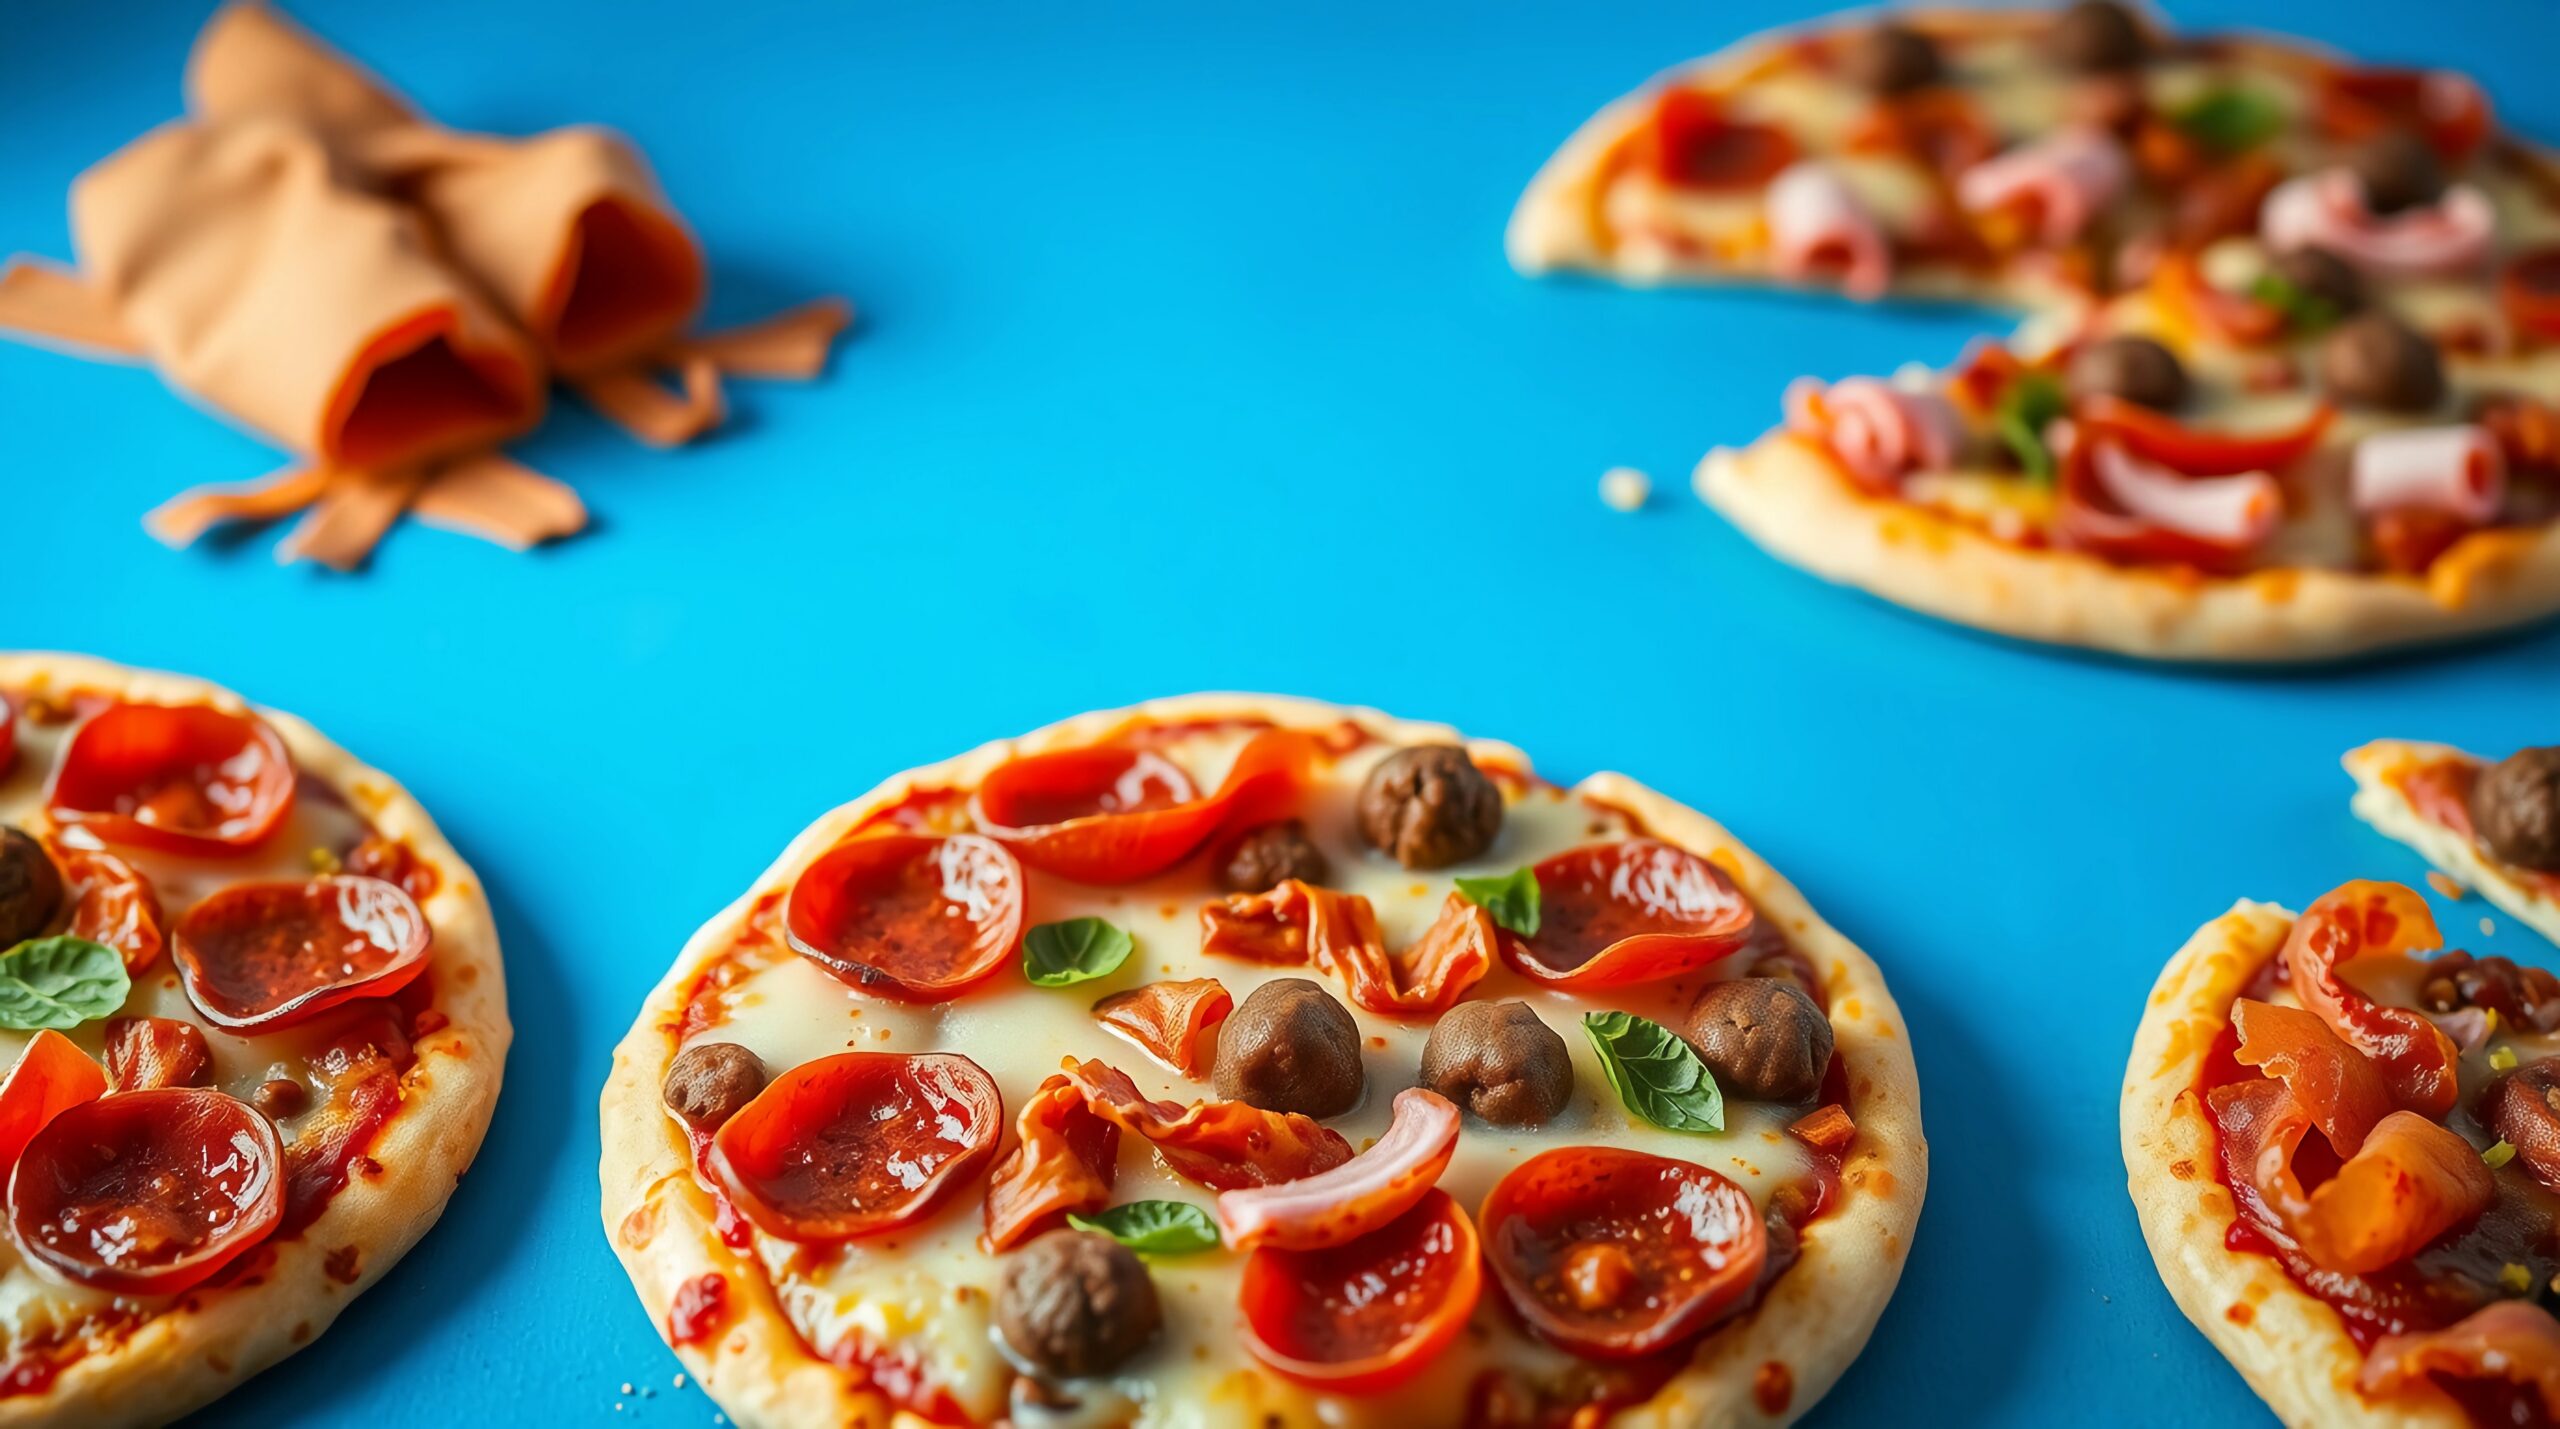
These Pizza Bombs deliver concentrated pizza flavor in every bite. The exterior is golden and slightly crispy with a buttery, herbaceous coating from the Italian seasoning brush. You’ll taste oregano, basil, and garlic notes right away, enhanced by the nutty saltiness of Parmesan cheese.
The interior is where the magic happens. Breaking through that tender biscuit crust reveals a pocket of melted mozzarella cheese—stretchy, creamy, and rich. The pizza sauce provides tanginess and slight sweetness, while the pepperoni adds savory, slightly spicy meat flavor with those characteristic crispy edges and rendered fat.
The biscuit dough itself is tender and fluffy, with a slight butteriness that complements rather than competes with the pizza filling. It’s substantial enough to hold everything together but light enough not to feel heavy or doughy.
Overall, these taste like miniature calzones or pizza pockets, but fresher and more flavorful than anything you’d find in the freezer aisle. The combination of textures—crispy top, tender dough, melty cheese, and meaty pepperoni—creates a satisfying contrast in every bite.
─────────
Tips for Making the Best 30-Minute Pizza Bombs
- Don’t overstuff: Less is more here. Two teaspoons of sauce, a small handful of cheese, and two pepperoni slices is plenty. Overstuffing makes sealing difficult and increases the risk of leaking.
- Seal tightly: Pinch the dough edges firmly and make sure there are no gaps. You can crimp with a fork for extra security if needed.
- Use thick pizza sauce: Watery sauce will make the dough soggy and is more likely to leak out. Pat pepperoni slices dry if they’re particularly oily.
- Customize your fillings: Try cooked sausage, Canadian bacon, olives, bell peppers, mushrooms, or different cheese combinations. Just keep volumes small.
- Space them properly: Leave at least an inch between bombs on the baking sheet. They’ll expand slightly during baking.
- Brush generously: Don’t be stingy with the herb butter. It’s what makes them look and taste amazing.
- Work quickly: Keep unused biscuit dough covered while assembling others so it doesn’t dry out.
- Serve with marinara: Extra pizza sauce or marinara on the side makes an excellent dipping sauce.
- Make them ahead: Assemble pizza bombs and refrigerate for up to 2 hours before baking. Add 2-3 minutes to baking time if they’re cold.
─────────
Serving Suggestions and Side Pairings
30-Minute Pizza Bombs are wonderfully versatile and work for multiple occasions:
As an appetizer: Arrange on a platter with a bowl of warm marinara sauce in the center for dipping. Garnish with fresh basil leaves for color.
As a main dish: Serve 3-4 pizza bombs per person alongside a fresh Italian salad with vinaigrette and garlic bread for a complete meal.
For parties: These are perfect finger foods for game day, movie nights, or casual gatherings. Set up a dipping station with different sauces.
Kids’ meals: Pack in lunch boxes with a small container of marinara, or serve as an after-school snack with veggies and ranch.
Pairing suggestions:
- Caesar salad with crispy romaine and shaved Parmesan
- Italian wedding soup or minestrone
- Antipasto platter with olives, pickled vegetables, and cured meats
- Caprese salad with fresh mozzarella, tomatoes, and basil
- Garlic knots or breadsticks
─────────
Storage, Reheating, and Make-Ahead Tips
Storage: Store cooled pizza bombs in an airtight container in the refrigerator for up to 3 days. The biscuit dough will soften slightly but they’ll still taste delicious.
Reheating: Reheat in a 350°F oven for 8-10 minutes to restore some of the exterior crispness. An air fryer works beautifully at 350°F for 5-6 minutes. Microwave reheating is quickest (30-45 seconds) but results in softer, less crispy exteriors.
Make-ahead assembly: Assemble pizza bombs completely and place on the baking sheet. Cover tightly with plastic wrap and refrigerate for up to 4 hours before baking. Brush with butter mixture just before baking.
Freezing unbaked: Freeze assembled, unbaked pizza bombs on a baking sheet until solid, then transfer to a freezer bag. Bake from frozen at 375°F for 20-22 minutes.
Freezing baked: Cool completely, wrap individually, and freeze for up to 2 months. Reheat from frozen in a 350°F oven for 12-15 minutes.
─────────
Why This Recipe Deserves a Spot in Your Rotation
These 30-Minute Pizza Bombs are the epitome of smart home cooking. They deliver restaurant-quality flavor using grocery store shortcuts, proving you don’t need to spend hours in the kitchen to create something memorable. The recipe is forgiving enough for beginners yet satisfying enough that experienced cooks will appreciate the results.
From a practical standpoint, this recipe solves multiple problems. It’s quick enough for weeknight dinners when time is tight. It’s fun and interactive, making it perfect for cooking with kids. It uses affordable, readily available ingredients that don’t require special trips to specialty stores. And it’s easily customizable, so picky eaters can have their bombs made exactly how they like them.
The universal appeal of pizza flavors means these disappear at gatherings, and the individual portion format makes serving easy and mess-free. Plus, there’s something undeniably delightful about biting into a golden pocket and discovering all that melty, gooey goodness inside. It’s comfort food at its finest—simple, satisfying, and smile-inducing.
─────────
Recommended Drink Pairing
Beer: A light Italian lager like Peroni or Moretti complements the pizza flavors without overwhelming them. An amber ale also works well with the pepperoni.
Wine: Chianti or Sangiovese—classic Italian reds—match the tomato sauce and cheese beautifully. For white wine drinkers, a crisp Pinot Grigio cuts through the richness nicely.
Non-alcoholic: Italian soda in flavors like blood orange or lemon provides sweetness and effervescence that contrasts with the savory bombs. Classic cola or root beer also pair well with pizza flavors.
Cocktail: An Aperol Spritz with its bitter-orange notes and bubbly texture offers a sophisticated, refreshing contrast to the rich, cheesy pizza bombs.

30-Minute Pizza Bombs
30-Minute Pizza Bombs are golden biscuit pockets stuffed with pizza sauce, melty mozzarella, and pepperoni, brushed with Italian herb butter for the ultimate quick bite.
4
servings15
minutes15
minutes250
kcal30
minutesIngredients
1 can refrigerated biscuit dough
0.5 cup pizza sauce
1 cup mozzarella cheese
24 slices pepperoni
1 tsp Italian seasoning
2 tbsp butter
2 tbsp Parmesan cheese
Directions
- Preheat the oven to 375°F (190°C) and lightly grease a baking sheet with cooking spray or line it with parchment paper.
- Open the can of biscuit dough and separate the biscuits. Flatten each biscuit slightly with your hands.
- Add about two teaspoons of pizza sauce to the center of each biscuit, and top with some shredded mozzarella cheese.
- Place two slices of pepperoni on top of the cheese, ensuring not to overstuff the biscuit dough.
- Carefully fold the edges of the dough over the filling and pinch to seal completely, forming a ball.
- Place the pizza bombs seam side down on the prepared baking sheet, ensuring they’re spaced slightly apart.
- Melt butter and mix in Italian seasoning. Brush the tops of the pizza bombs with the butter mixture.
- Sprinkle each pizza bomb with Parmesan cheese and bake for 15 minutes or until golden brown.
- Remove from oven and let cool slightly before serving to enjoy melty, delicious pizza bombs.
Nutrition Facts
- Total number of serves: 4
- Calories: 250kcal
- Cholesterol: 0mg
- Sodium: 620mg
- Potassium: 400mg
- Sugar: 8g
- Protein: 6g
- Calcium: 60mg
- Iron: 2mg
About This Author

Aurora Wright
Pastry Chef & Dessert Editor
Aurora is the sweet side of Daily Dish. A trained pastry chef and dessert stylist, she’s responsible for our mouth-watering cakes, cookies, and confections. She brings precision, artistry, and a touch of whimsy to every recipe she creates — and taste-tests more chocolate than she’ll admit.
Favorite dish: Flourless dark chocolate torte.
Kitchen motto: “Life’s too short to skip dessert.”


