Daily Dish

Artisan Bread

Healthy Fact of the Day

Homemade artisan bread can be a nutritious addition to your diet, as it contains no preservatives or additives commonly found in store-bought breads. Plus, the fermentation process helps break down gluten, making it easier to digest for some people.

Ingredients


  • 3 cups all-purpose flour
  • 1 tsp active dry yeast
  • 1 1/2 tsp salt
  • 1 1/2 cups warm water


Instructions

  1. In a large bowl, mix together the flour, yeast, and salt until well combined.

  2. Gradually add the warm water to the dry ingredients, stirring with a wooden spoon or your hands until a shaggy dough forms.

  3. Cover the bowl with plastic wrap and let the dough rest at room temperature for 12-18 hours, allowing it to ferment and develop flavor.

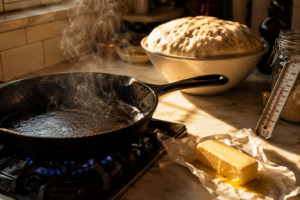
  4. After the resting period, preheat your oven to 450°F (230°C) and place a Dutch oven with its lid on inside to heat up.

  5. Meanwhile, turn the dough out onto a well-floured surface and shape it into a ball, tucking the edges underneath to create a smooth top.

  6. Carefully remove the hot Dutch oven from the oven and place the dough ball inside, seam-side up.

  7. Cover the Dutch oven with its lid and return it to the oven. Bake for 30 minutes.

  8. After 30 minutes, remove the lid and continue baking for an additional 15-20 minutes, or until the bread is golden brown and sounds hollow when tapped on the bottom.

  9. Remove the bread from the Dutch oven and let it cool on a wire rack for at least 1 hour before slicing.

Get ready to impress your friends and family with your newfound bread-making skills – they’ll be asking for your secret recipe in no time!

Recent Recipes

Drake Maye’s Raising Cane’s Order Reveals the

  • February 7, 2026
  • 4 min read

Overnight Baked Banana French Toast Casserole

  • February 7, 2026
  • 10 min read

Pork Stir Fry

  • February 7, 2026
  • 7 min read

The End of an Era: Minute Maid

  • February 6, 2026
  • 4 min read

Garlic Parmesan Meatloaf

  • February 6, 2026
  • 6 min read

Black Cherry Whiskey Sour

  • February 5, 2026
  • 9 min read

Southwest Egg Rolls

  • February 5, 2026
  • 7 min read

Slow Cooker Apple Butter Glazed Pork Tenderloin

  • February 4, 2026
  • 6 min read

Tuscan Mac & Cheese

  • February 4, 2026
  • 1 min read

Instant Pot Mexican Beef Barbacoa Tacos

  • February 3, 2026
  • 1 min read

Tip of the Day

“Always let your meat rest before slicing.”

Whether you're roasting a chicken, grilling steak, or baking pork tenderloin, letting cooked meat rest for 5–10 minutes before slicing allows the juices to redistribute evenly. This simple step keeps your meat juicy and tender, ensuring every bite is flavorful and moist. Bonus: It gives you a moment to plate your sides or garnish for a perfect presentation!

Our Latest Recipes

Blog
Daily Disher

Drake Maye’s Raising Cane’s Order Reveals the Side Item He Can’t Get Enough Of

Craving crispy fries like Drake Maye but want a healthier version? Cut potatoes into wedges, toss with a small amount of olive oil and your favorite seasonings, then bake at 425°F for 30-35 minutes, flipping halfway. For extra crispiness, soak the cut potatoes in cold water for 30 minutes before baking to remove excess starch. You’ll get that satisfying crunch with less oil and more control over sodium and ingredients.

Read More »
Asian
Daily Disher

Pork Stir Fry

Pork tenderloin is one of the leanest cuts of pork, providing high-quality protein with less saturated fat. Stir-frying preserves more nutrients in vegetables compared to boiling or overcooking.

Read More »

Get your daily dose of delicious!

Skip to content